Introduction
In digital photography the one thing we have plenty of is options. What brand of camera to buy (I wouldn’t dare touch that one!). What options to select from the camera’s seemingly endless menu choices. What brand of computer to buy, and what digital imaging software to buy (I won’t touch that one here, either!). This article covers digital imaging in general, which transcends individual manufacturers or trademarks.
File Formats
Digital anything (general computing, sound, video or still photography) means recording, interpreting, manipulating and outputting variables as strings of ones and zeros (“bits” of data), usually very, very long strings of ones and zeros, in understandable ways. Taken out of context, the bits mean nothing. Context, or meaning, comes with the format we are using. Kodak, Nikon, Canon, Apple, Microsoft, Sony, Adobe, Epson and others worked together to establish and share standard imaging formats so that an image recorded on any camera could be displayed and manipulated by any computer and successfully output to any printer.
One of the first still photography formats established was .JPEG which is an acronym for Joint Photographic Experts Group. The same gang also came up with .MPEG format, or Motion Picture Experts Group, but that’s beyond the scope of this blog. Another format that’s been around for a long time is .TIF which stands for Target Interchange Format. Adobe, the big dog of the digital imaging world, came up with .PSD which can only be read in their Photoshop software.
About 15 years ago, Adobe came up with Camera Raw format aimed at the whole industry, essentially forcing other camera, computer and software makers to adapt to it. They adapted in a common way - sort of. Nikon calls their version Nikon Extended Format (.NEF). Panasonic calls it .RW2 (perhaps meaning raw version 2?). Etcetera. Not only are there different names (file extensions) for camera raw, but there are differences in coding, too. As newer technologies were developed and updates were made, Adobe had to update Camera Raw standards to fit camera makers’ updated versions of Camera Raw (or maybe it happened the other way around?). When I bought a Nikon D-3200 a few years ago, my old version of Camera Raw within Photoshop-6 couldn’t read the D-3200’s .NEF format. I couldn’t just change the Camera Raw plug-in to a newer version, so I had to buy a whole new Photoshop package. I guess that counts as clever business practice - as viewed from their end. But I digress.
Color Balance
In the days of color film photography, we could purchase “daylight” or “tungsten” balanced film, meaning we could expect natural looking colors only when exposing under those light sources. If the light varied from those norms, we could use color correcting filters over the lens (or the lights) to change how colors were rendered. This worked well sometimes. Sometimes not so much. The idea was to get neutral color subjects (equal parts of red, green and blue color) to remain neutral when captured. This was called color balancing and it was based on the fact that if your system can correctly render neutral (gray) it can correctly render almost all other colors from the scene simultaneously.
Digital technology came to video cameras before still cameras, and the video camcorder electronic adjustment for off-colored light sources was called “white balance.” That term transferred over to digital still cameras when they came along. So, today, we don’t have to attach color filters when the light is other than direct sunlight, we go to the White Balance (WB) settings on the camera menu and punch in daylight, or cloudy, tungsten, flash, automatic, custom, etc. The camera firmware adjusts color rendering to match what we select. Cool!
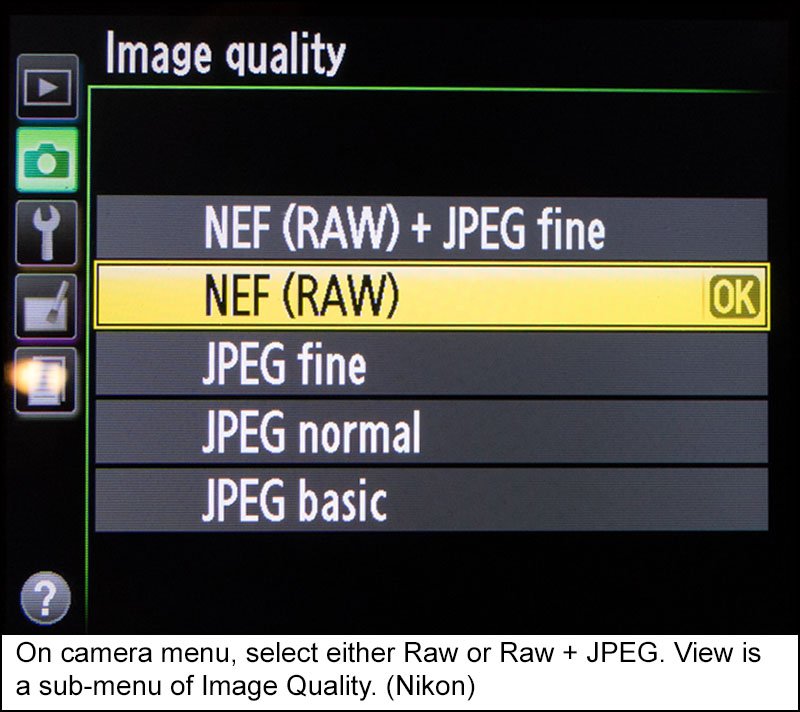
Always Shoot RAW
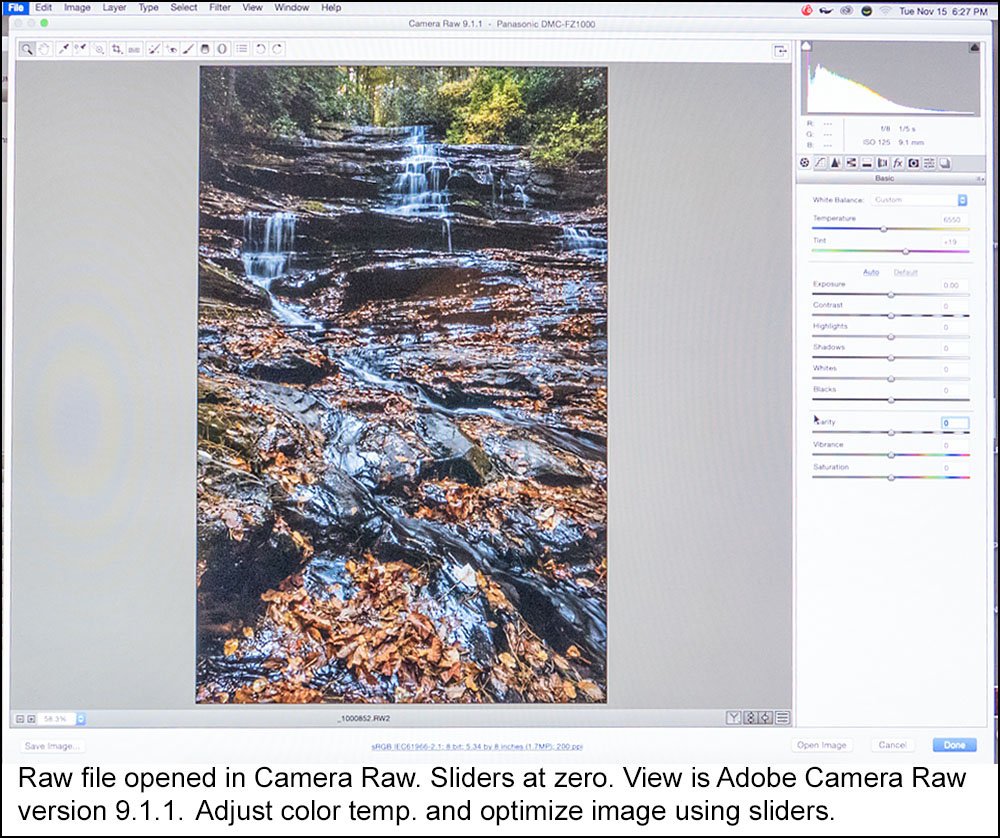
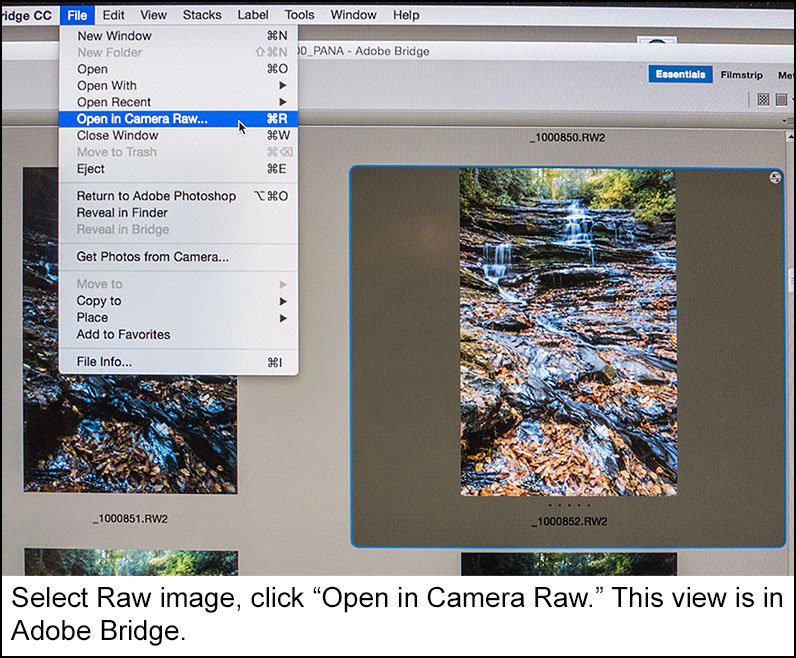
Back to Camera Raw for a moment: When shooting in raw format on your camera, it doesn’t matter what you select for WB. Automatic WB is good as any. You can adjust it on your computer when opening the image and adjusting sliders on the Camera Raw part of your software. Note that this way-cool feature of the processing software is available even if you don’t shoot in raw! There are too many advantages and reasons to set your camera to capture in raw format to discuss all of them here. Most cameras even allow you to simultaneously record images in Raw and JPEG formats. I don’t do that, but lots of photographers do.
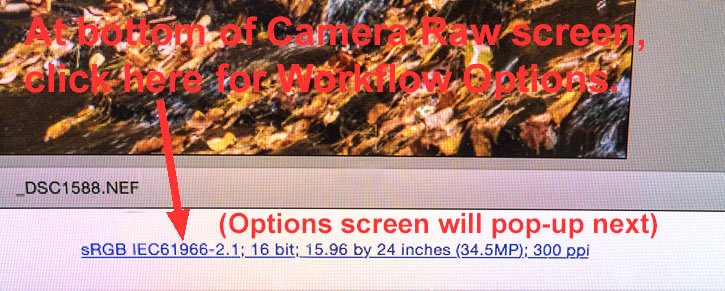
RECOMMENDATION NUMBER ONE: SHOOT IN RAW FORMAT! That way, if you capture a jewel of an image and want to use it as a large print for display, competition, etc., you have all of the best options available to optimize image quality as you process it. If you shoot in JPEG only, your options are much more limited. A final point not always understood about Camera Raw processing: the output size and resolution settings in Camera Raw are the VERY BEST ways to enlarge a digital image. For example, a picture shot with a 5-megapixel camera can be output from Camera Raw as a 20 (or more) megapixel image that will print beautifully. That doesn’t hold true for just commanding Photoshop (or other software) to make image size larger.
JPEG is Lossy but Useful
Are there advantages to JPEG? Sure. First, JPEG is a COMPRESSION scheme. It makes your files smaller for storage and faster to load and to send out over the net or attached to emails. Also, some printers (both desktop machines and outside printing companies) only accept JPEG format. But beware! The JPEG compression scheme is “lossy” meaning that each time you save an image as a .JPEG some of your data is lost or thrown away. One or two times is not noticeable, but the losses are cumulative. RECOMMENDATION NUMBER TWO: DO NOT SAVE AN IMAGE AS A .JPEG REPEATED TIMES. And when saving an image as a JPEG for making a large print, set the JPEG quality slider to 12 (the highest setting).
Sharpening
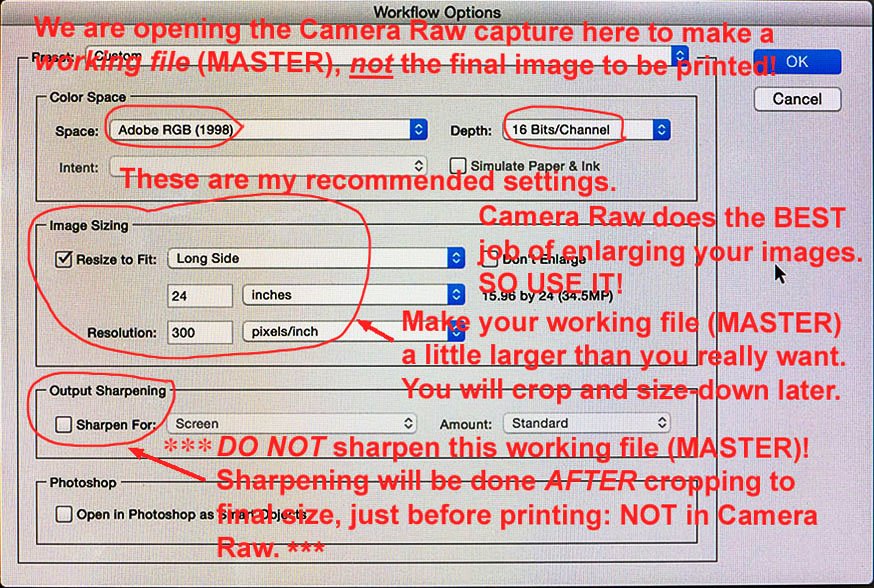
Next, let’s consider image sharpening. Most digital camera images and scanner outputs benefit from judicious use of the image sharpening function of your software. But beware again: each sharpening operation degrades your image somewhat, and the losses are cumulative. RECOMMENDATION NUMBER THREE: DO NOT SHARPEN AN IMAGE MORE THAN ONE TIME AND DON’T OVERDO IT! There are several ways to sharpen an image, each with its advocates. A common way that usually gives pretty good results is Unsharp Masking. On the Unsharp Masking dialog box, I use amount (or strength) of 75, radius of one pixel, and threshold of zero as my starting point. Too much sharpening is obvious and ruins subtlety in the image.
Organization
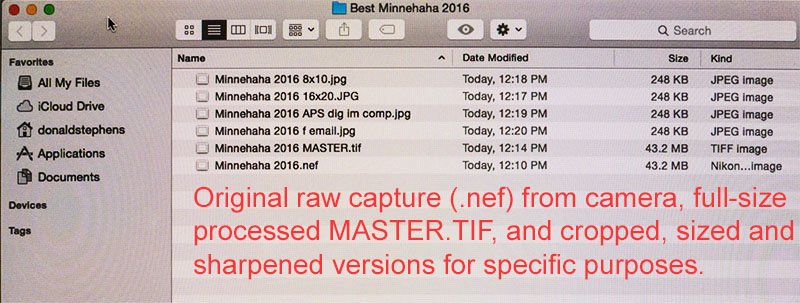
So, let’s wrap this up with my recommendations for what to do with that masterpiece you just captured (hopefully in Raw). I want you to save at least three versions of this image. One will be full-frame and just as it came out of the camera, e.g., “102034.NEF.” OK, go ahead and rename it to avoid confusion, e.g., “Grand Canyon May 2016.NEF.” Do not do any image processing or cropping or image sharpening on this version. Instead, optimize the image in Camera Raw but do not crop or sharpen yet. Save As a .TIF, with output large enough to make the largest print you might want (e.g., 24 inches on the long side), at 300 pixels per inch (ppi), in Adobe RGB color space and with 16-bit color depth. Note that I am not explaining some of these details in this blog. Trust me and just do it! Save As “title MASTER .TIF.” e.g., “Grand Canyon May 2016 MASTER.TIF.”
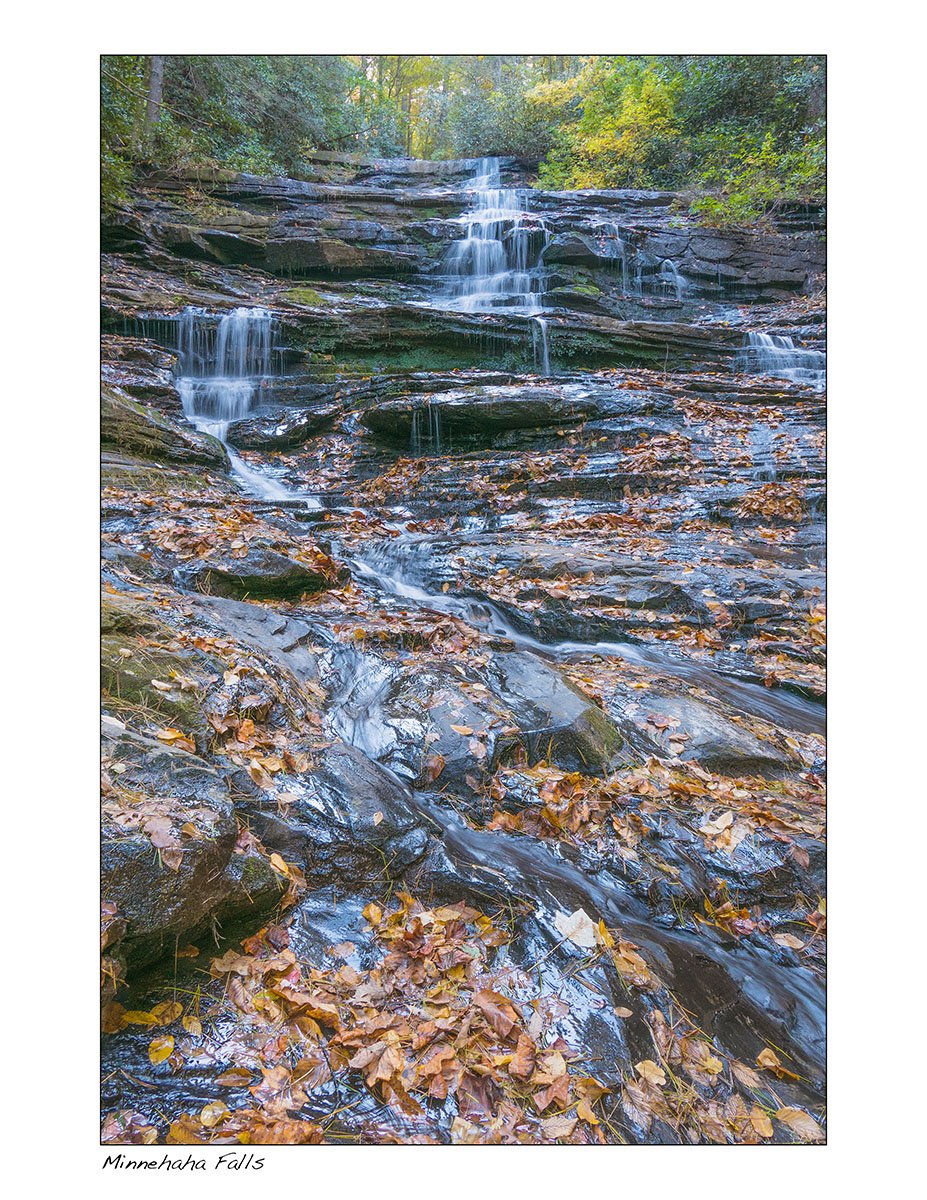
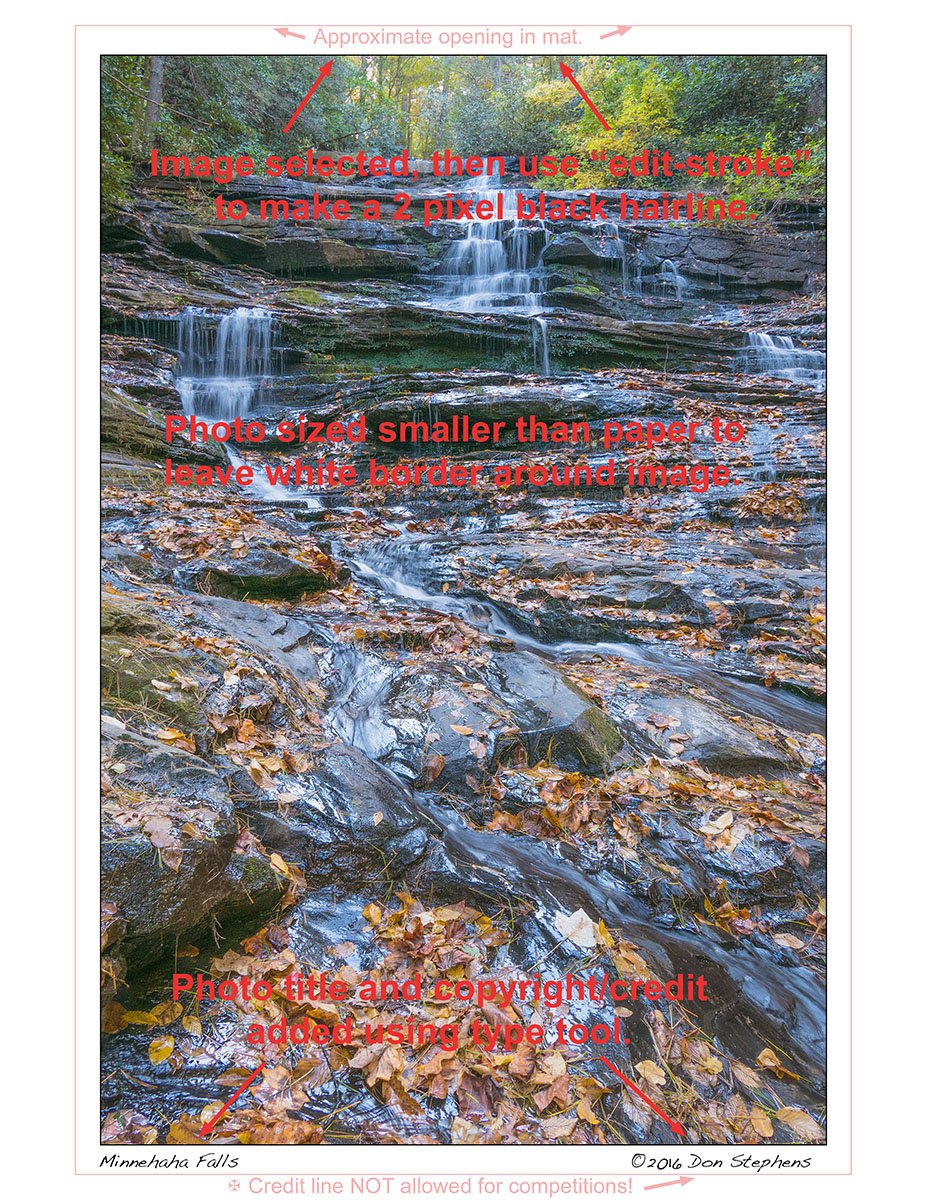
You now have two versions saved: one right out of the camera and the second a large image optimized in Camera Raw (the master version). Now determine exact crop and printed size you decide you want, e.g., 12.5 inches by 17 inches for a 16x20 mat or frame. After sizing and cropping, NOW do the image sharpening. I like to put a thin black “hairline” around the image and provide a white area around that, and put the title and perhaps my name, copyright symbol and date in the white area at the bottom, but that is a matter of personal taste. Convert the color space to SRGB because that fits the printer’s limited gamut better than the broader color space Adobe RGB. Change color depth to 8-bit if your printer doesn’t accept 16-bit. Save As “Grand Canyon May 2016 16x20.JPG” with quality 12. We have now saved the actual image we want to print. When printing, apply the color profile for your printer.
If it needs more work, or a different size/use
Now, if you decide to play with the image some more, you can open the original or the MASTER in Camera Raw then Save As a new title, e.g., Grand Canyon May 2016 Ver. B. Note that caution is required to NOT simply “save” the changed image because that will overwrite the earlier version that you just opened and you may not be able to recover it. If you’re pleased with the image but want to use it for another purpose, go back to the MASTER, change size and resolution as required, sharpen the image as needed, and Save As “Grand Canyon May 2016 8x10.JPG” for example. Put all the versions in a folder labeled so that you know what’s in it.
Questions? Talk to Don at APS, call him at 770-967-2788 or email him.
About Don Stephens
Don Stephens is a retired professional photographer and a long-time member & former President of APS. He’s also retired military, a former steely-eyed missile man in charge of Nike anti-aircraft missiles armed with nuclear warheads. So he’s consistently particular about technical details, and he always “arms” his fellow photographers with good advice.