“Are your images Photoshoped?” is a question that I get often and can always easily answer. “No. I don’t use Photoshop, but I do use some great photography software that is much cheaper, and even free.” And now that Adobe has gone to a pay perpetually (subscription) pricing model, it might be well worth your while to check out these great free and inexpensive programs that I use all the time.
This article, the first in a series of three, covers Raw Therapee, an outstanding raw converter - you do shoot Raw, don’t you! The next two will acquaint you with Picture Window Pro, a superb, inexpensive image editing program built specifically for photography, and Lightzone, a unique, free editing program that includes special tools you won’t find anywhere else.
Raw Converter - Raw Therapee
Raw Therapee is free, open-source raw image conversion software. It’s cross platform: Linux, Mac or Windows (32 or 64 bit), and it’s International - available in 25 different languages. You can download Raw Therapee free, and full documentation is available online or for download in English, French and Japanese. It’s regularly updated (current version 4.2, initiated during 2006) covering every camera and format that you can think of, as is it’s “Wiki-like” user-guide/documentation.
The program has a wealth of features with the robust user interface simply divided into three parts: Browser - to navigate between images and folders, Editor - where all the exposure, detail, color and other tools are used, and the Queue - where conversion takes place, either as a batch or in the background.
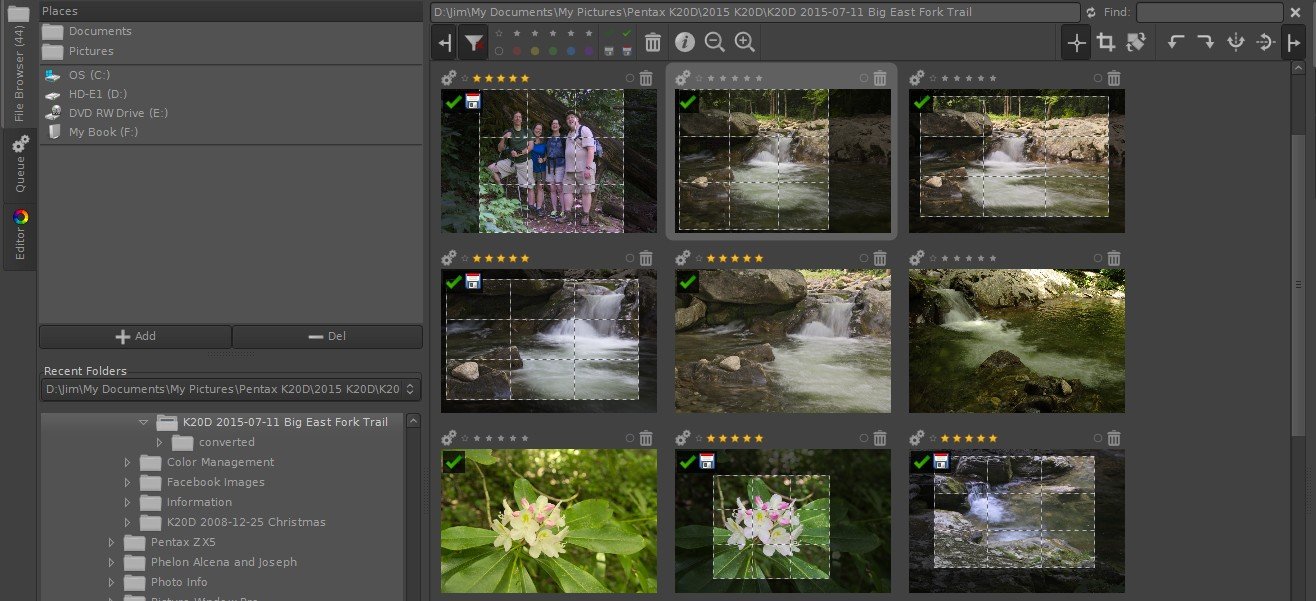
Here’s a screen shot of the Raw Therapee Browser:
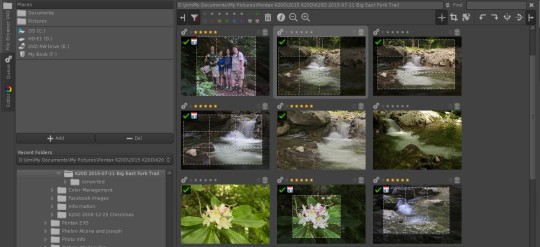
This is where one selects images to edit, and select images to convert from raw to your chosen format (eg: tiff, jpeg, etc.) Note the very handy star and color code system to rate or sort your images. Images edited have a check mark, those already converted show the disk symbol.
Next is a view of the Editor:
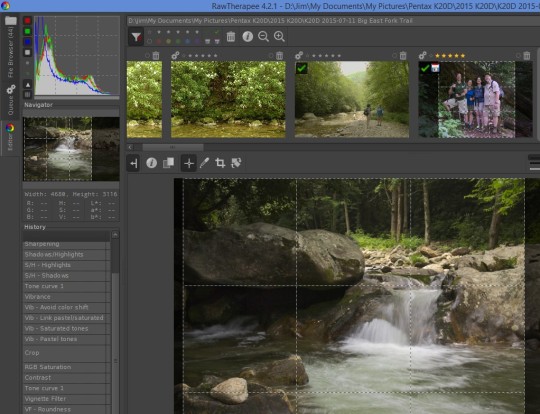
This shows changes to the images as you edit. Note the full feature histogram, history of image edits and the ability to toggle “before” and “after” views. One can also save “shapshots” of the editing sequence at any stage, show clipped highlights and shadows, and save custom processing profiles at any stage.
The Editor’s exposure tools are very full featured. This screen shows some of them:
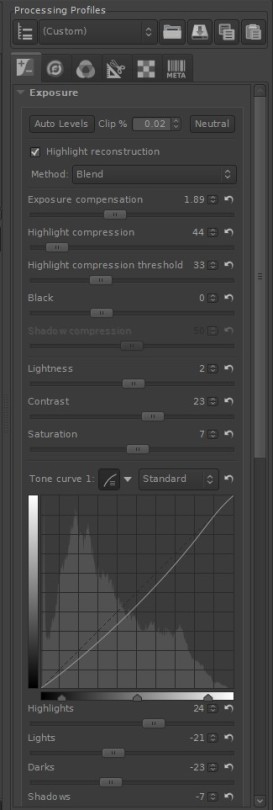
I find the most useful exposure tools to include highlight reconstruction, exposure compensation, saturation, shadows/highlights, tone curves - which are very flexible, and the vignette filter.
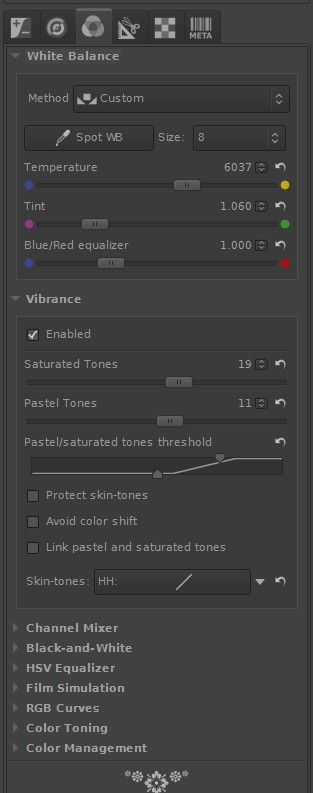
The Editor’s color tools are also wide-ranging. I most often employ the white balance and vibrance features. Here is a screen shot of some of the color tools:
Additional Editor tool sets include: Detail - for sharpening, edge enhancement, noise reduction, defringing, and others; Transform - for cropping, lens/geometry corrections such as perspective, distortion and chromatic aberation reduction. Even more Editor tools include: RAW - hot and dead pixel filters, and dark frame and flat field corrections; and Metadata - for Exif and ITPC (author, copyright, etc.) data.
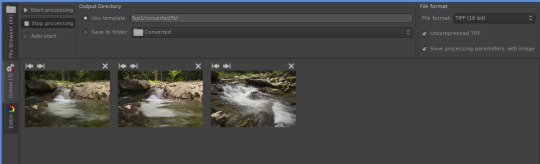
Finally the Queue serves to organize the actual raw processing. One may process images as they are placed in the queue, or as a batch for all images in the queue. I find the Output Directory “templates” very useful for placing raw-processed images in the proper folders. My system is to send “regular” images to a “Converted” folder within their “home” folder, HDR images to an “HDRConverted” folder, and panorama images to a “PanoConverted” folder. You can customize this kind of organization any way you like.
Here is a screen view of the processing Queue:
Overall, I find Raw Therapee to be an outstanding raw conversion option. I recommend that you give it a try. And remember, the “bang for the buck” is incredible! It’s absolutely free!!
Jim Harrison, President