“Are your images Photoshoped?” is a question that I get often and can always easily answer. “No. I don’t use Photoshop, but I do use some great photography software that is much cheaper, and even free.” And now that Adobe has gone to a pay perpetually (subscription) pricing model, it might be well worth your while to check out these great free and inexpensive programs that I use all the time.
This article, the second in a series of three, covers Picture Window Pro, a superb, inexpensive (it's now free!) image editing program built specifically for photography. The first article covered Raw Therapee, an outstanding raw converter - you do shoot Raw, don’t you! The last installment will acquaint you with Lightzone, a unique, free editing program that includes special tools you won’t find anywhere else.
Editor - Picture Window Pro
Update (2016-12-22): Picture Window is now available free of charge and no longer requires a serial number for operation.
Picture Window Pro (7.0) provides full feature photo editing capabilities in a very inexpensive, user-friendly interface. First released during 1994, it was designed specifically for photography and has received regular updates since.
Picture Window Pro is a product from Digital Light and Color, headed by Jonathan Sachs, the original developer of Lotus 1-2-3. Lotus was the first “killer app” for the IBM -PC back during the 1980′s and was instrumental in the success, popularity and growth of personal computers.
Picture Window has so many great features that a short article simply can’t cover them all. (it’s excellent user manual covers over 500 pages, plus numerous “white papers” also explain the details of how to do almost everything.)
Support also includes a message board/forum where user questions are answered quickly, both by the program’s developers (Jonathan Sachs and Kiril Sinkel) and knowledgeable users from around the world. (Just click on the links to access the manual, white papers and message board.)
For example, when I noticed that there didn’t seem to be a “clarity” function, a quick check of the message board solved that. Jonathan Sachs post about the “Local Contrast Enhancement” white paper let me know that bilateral sharpening with a large blur radius (40) and a sharpen factor < 1.8 does the trick.
Picture Window Pro sells for $89, and is a great bargain in this brave new world of subscription (pay forever) software pricing. Full evaluation versions, 64 or 32 bit, as well as the manual and white papers can be downloaded for free.
Here are a few examples to highlight this wonderful program’s key features and ease of use.
Brightness Curves
Most of Picture Window’s editing tools are found under the “Transformation” menu. Here we’ve selected “Brightness Curve” from the “Grey” transformation. Applying a brightness curve lets us quickly and easily improve the contrast and exposure for this image that’s much too “flat” after our RAW conversion.
Brightness Curve - Before
The brightness curve dialog allows us to add multiple control points anywhere on the histogram to adjust global brightness in many different ranges. We could also use a mask (more on masks later) to apply a brightness curve to any selected portion(s) of the image.
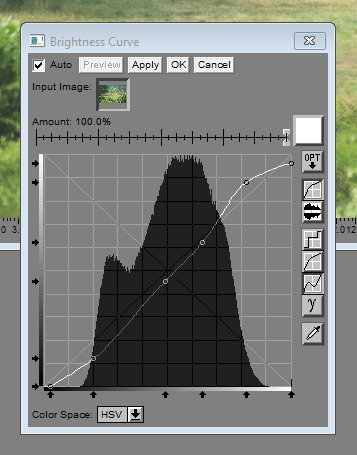
Brightness Curve - Dialog
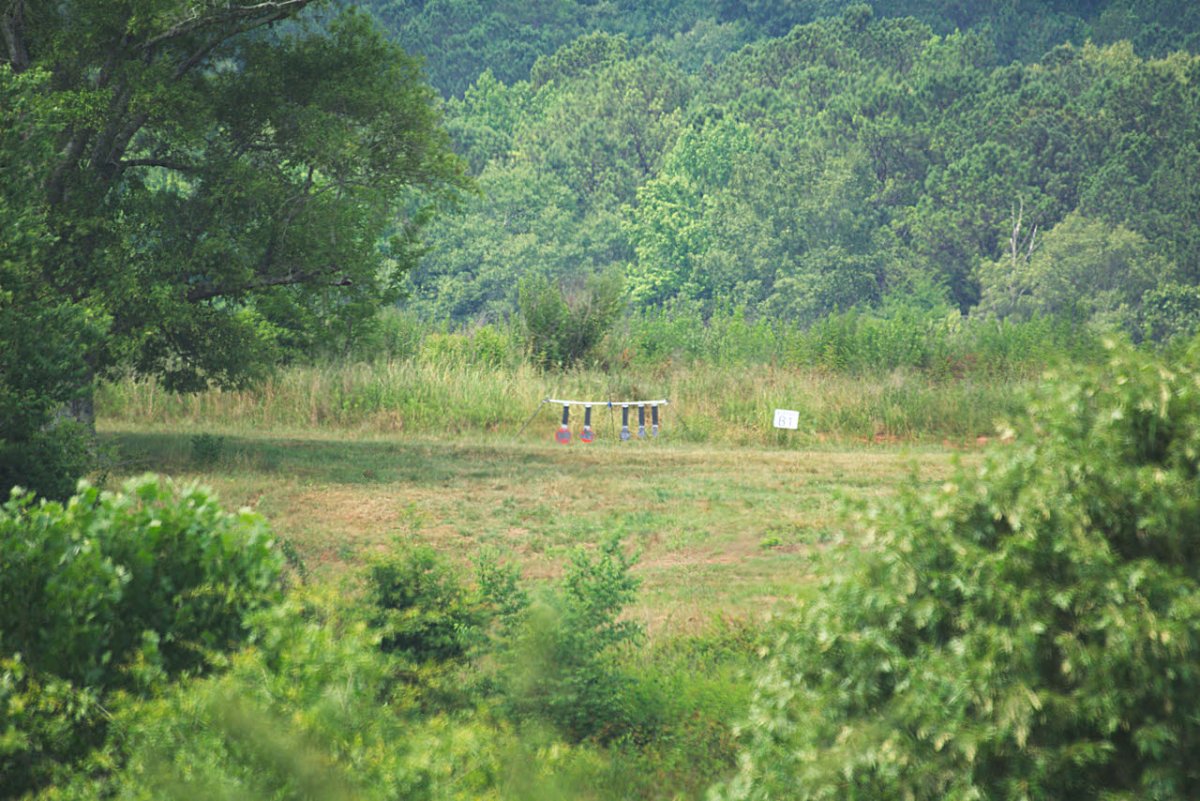
Selectively lowering the shadows and midtones while raising highlights, except for the small area of “blown” highlight in the large sign, let’s us quickly complete the image with much better contrast and perceived detail. The steel rifle targets in the center now show significantly better definition.
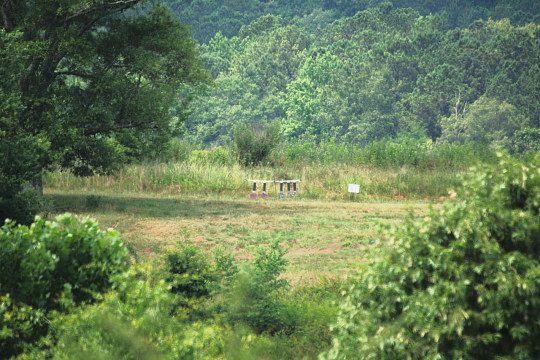
Brightness Curve - After
Masks
Extensive masking tools allow Picture Window to handle a huge variety of editing tasks (that are accomplished by “Layers” in programs such as Photoshop). This image has a nice budding Dogwood flower in the foreground, but the out-of-focus background is too busy and bright, detracting from the sharply focused subject.
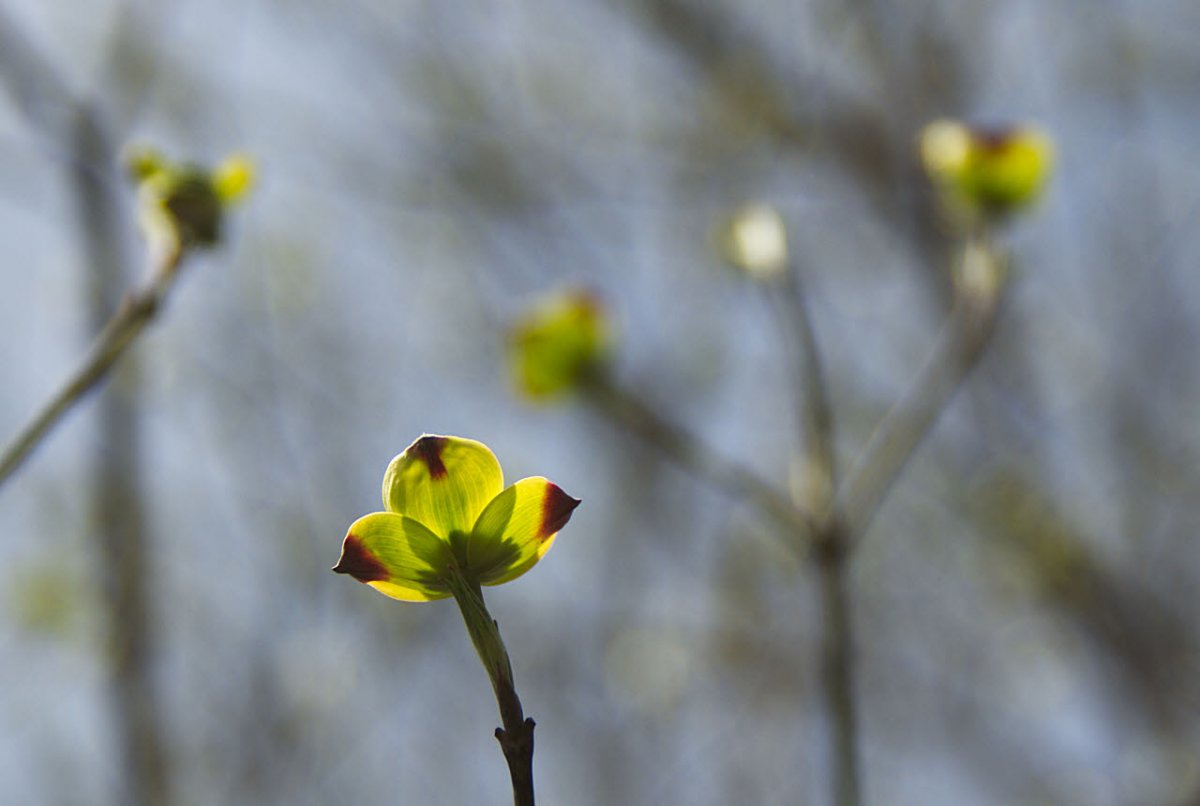
Before Applying a Brightness Curve to the Mask
The masking tools in Picture Window support easy selection of any shapes (or colors). Here we used the “similar pixels track” brush to select around the flower and stem in just a few seconds. We quickly expanded the mask to encompass the rest of the images, except the flower.
Mask Critical Area
Next, applying a brightness curve to darken only the masked area (all except the flower and stem), we get a resulting image that really “pops” the bright subject Dogwood flower.
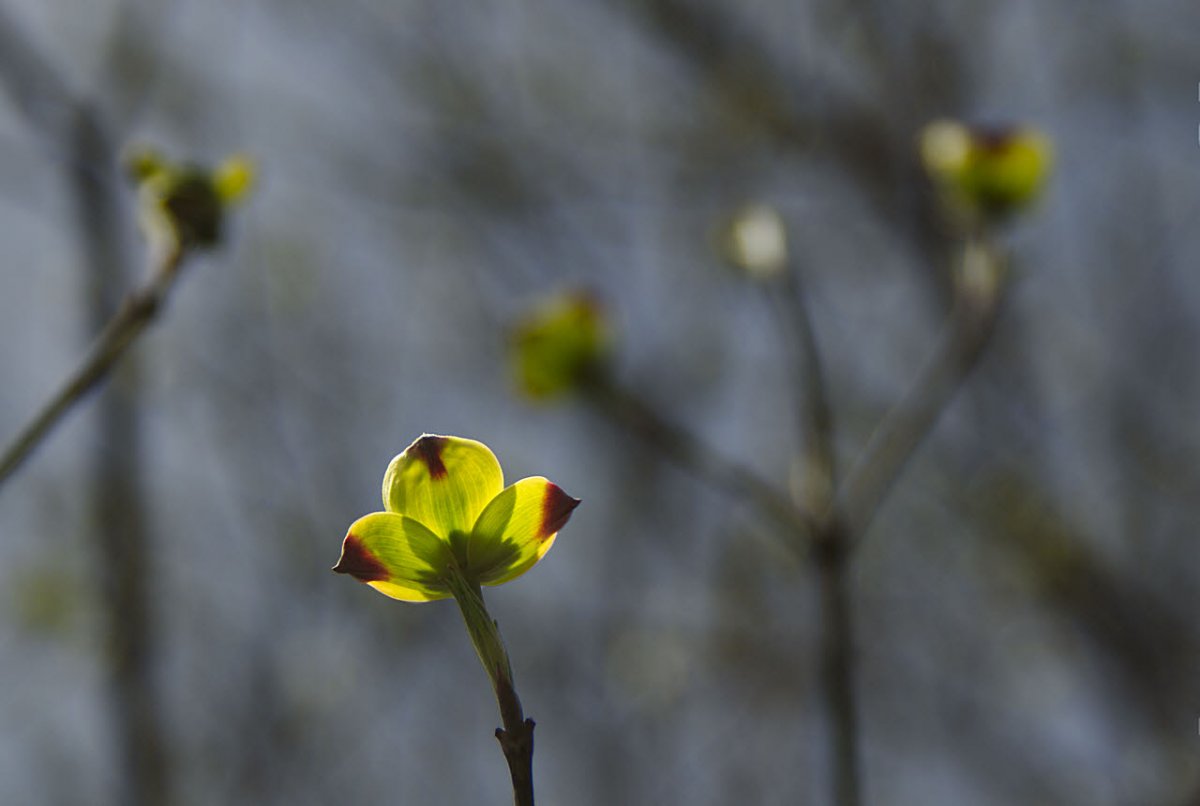
All but Critical Area Darkened Using Brightness Curve- The Subject “Pops”
Monochrome Conversion
Monochrome, or black & white, images are still a big part of photography and an important category for our club competitions. But (almost) all digital images are captured originally in color, so good color to monochrome conversions are a necessity. Picture Window makes this easy, including the quick testing of many options and filters to get a great conversion.
The very mono-tone cave image below just begged to be in black & white. Selecting “Monochrome” from the “Color” transformation menu we tried numerous options in seconds, settled on a pure red (100% red 0% green and 0% blue) filter for the initial conversion (top right in the figure below). With Picture Window’s flexible monochrome tools, one can pick any combination of “RGB” from the color space (shown below). One may also choose any existing color filter (glass filters traditionally used for film photography) by clicking “Options” in the color space dialog box.
The final image (bottom right in the figure below) uses a brightness curve to smooth the harsh lighting of the cave image while retaining the full range of subtle tonality in the subject cave formations.
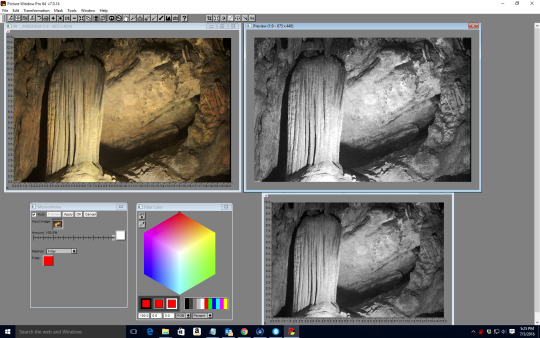
Monochrome Conversion
That concludes the first half of this summary of a few examples of Picture Window Pro’s outstanding features. The next installment will cover more great, unique features including 3-Zone Adjustments, Workflows (macros), and others, plus my conclusions.
Jim Harrison, President