Leveling the camera
A camera that's not level (side to side) can easily escape your notice when shooting, especially if you’re rushed, but the problem will jump out and bite you when the image hits the computer screen or on a print. That crooked camera will drag the optical horizon and vanishing points right along with it. Having three-point perspective happening plus a camera that's skewed from level makes fixes in post-production much harder.
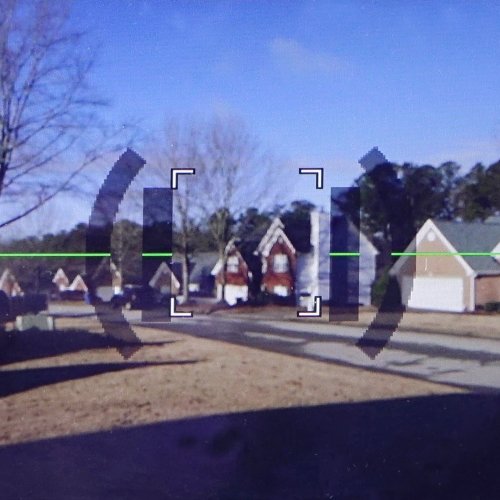
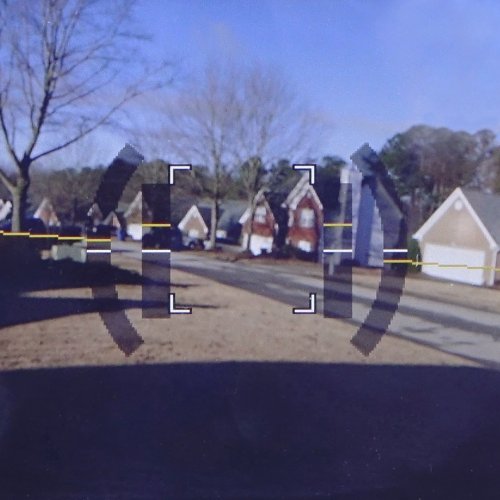
Prevention in the first place is always better than repairs later. Most modern digital cameras have a built-in level, or tilt-indicator, which can optionally be displayed on the viewfinder and/or monitor along with the image. The indicator may also show the other axis: up-down camera tip information. The indicator works for both horizontal and vertical shooting. Great for hand-held shooting.
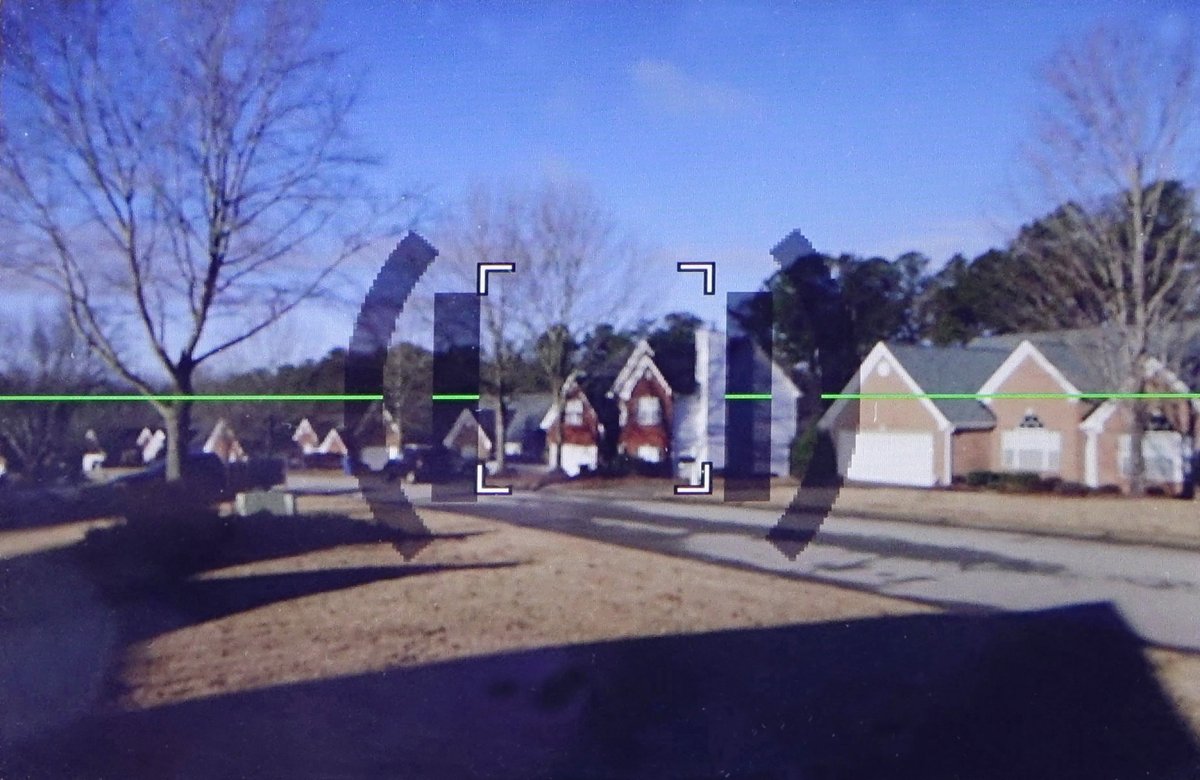
Lumix Tilt-Indicator - level
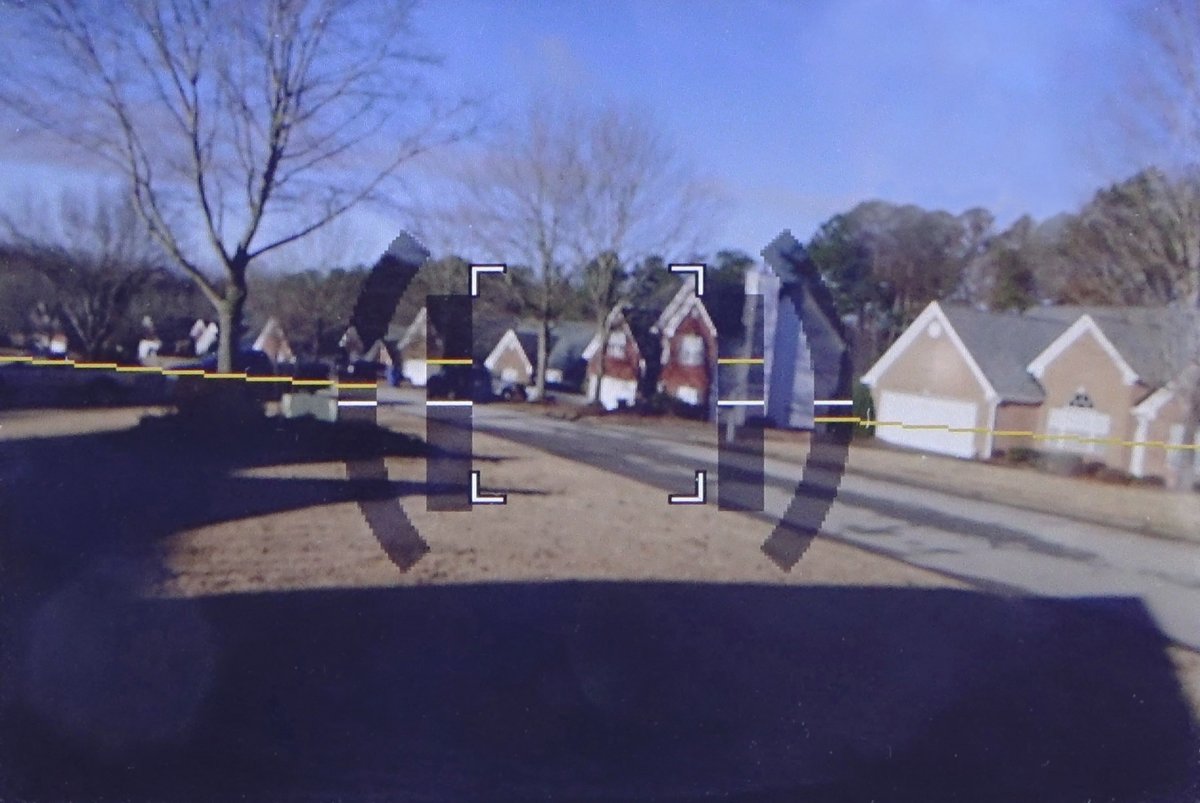
Lumix Tilt-Indicator - not level
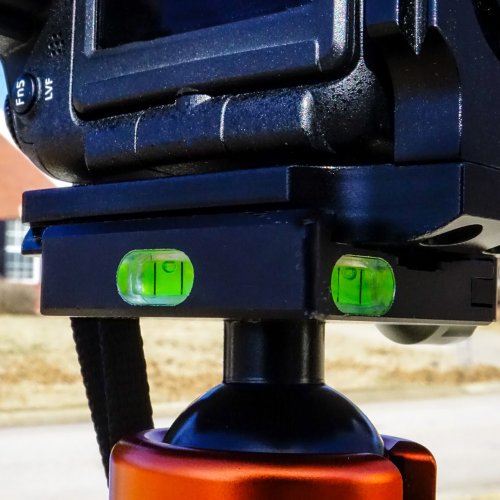
If you have this feature, by-all-means use it. It may be displayed as a smooth, horizontal green line across the center of the viewfinder, or a shorter line with arrowheads on both ends. If the camera is out of level, the indicator line will itself become crooked or jagged and change color. Without this in-camera electronic level, try to level your camera to correspond with the center-most plumb line in the subject. Beware of using subject horizontal lines for leveling, because our old friend two-point perspective will jump up and bite you. Most of my illustrations are of architecture, selected to make the flaws obvious, but shooting with the camera level is often important in all photography, including scenery and living subjects. Bubble-levels built into the tripod head also help.
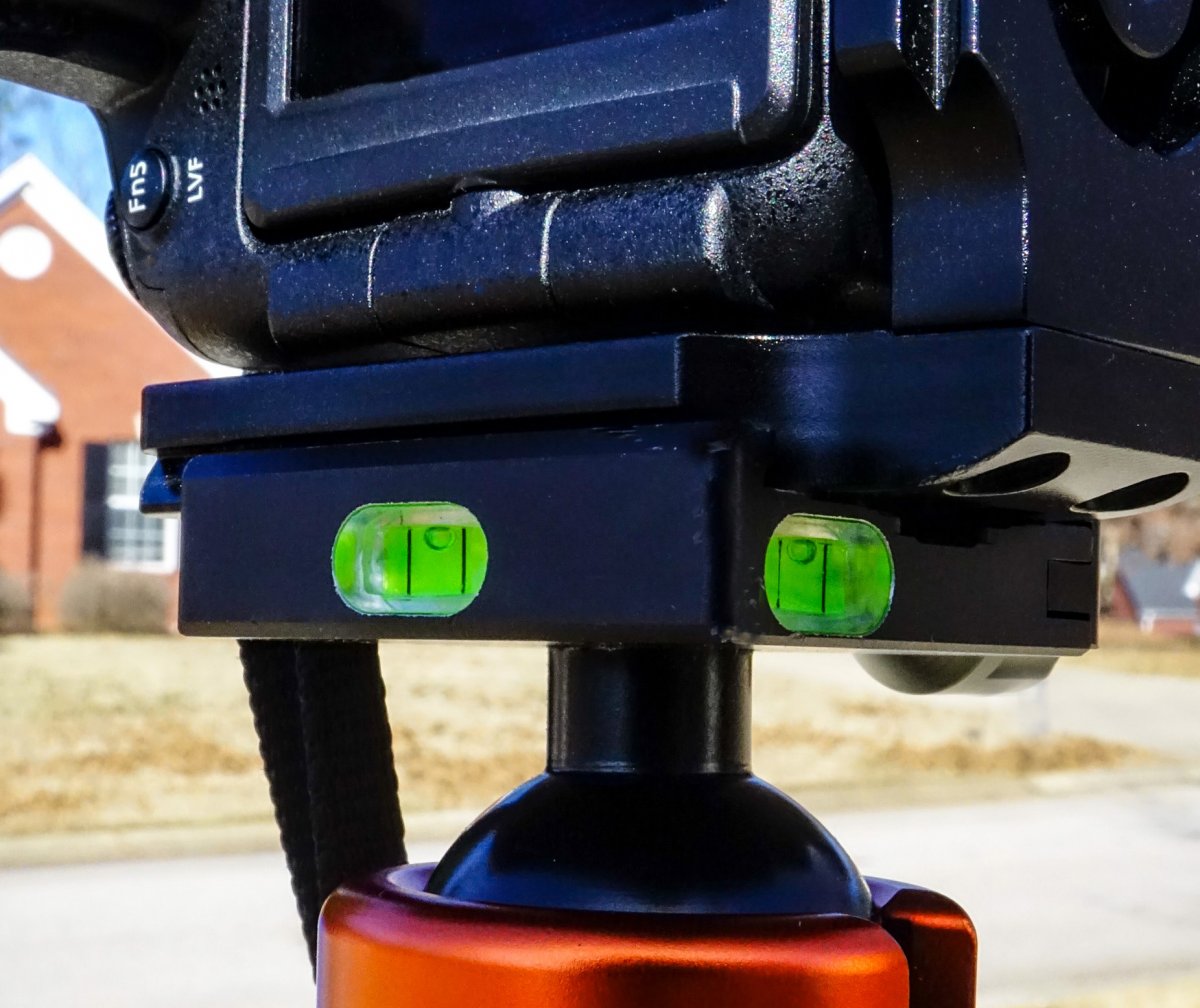
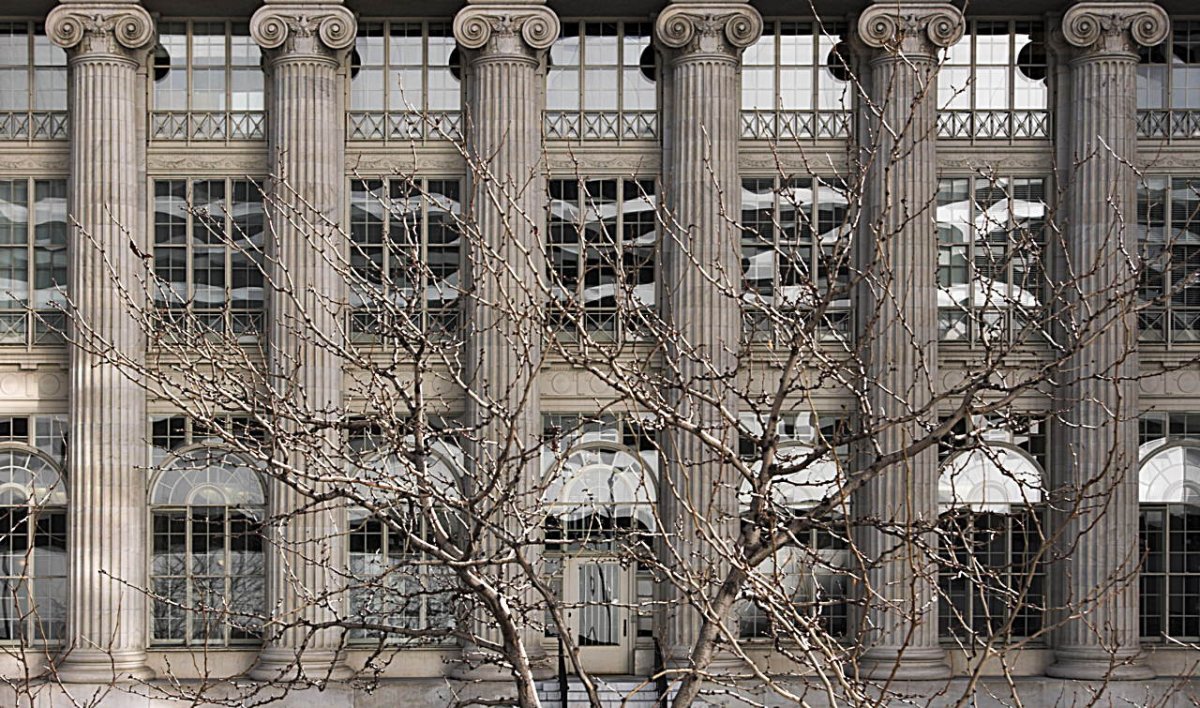
Tripod Head Bubble Levels
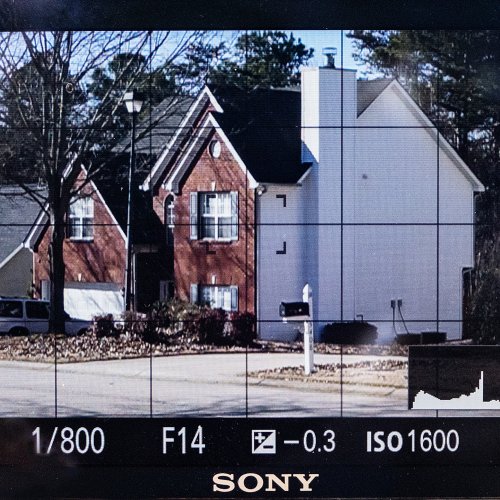
Digital cameras may also feature grid lines, as an optional display. Camera grid lines are useful for several purposes, but for leveling, a grid can help you visually tilt the camera so the subject’s center-most plumb line(s) correspond to the grid. I stress center-most, because vertical lines out at the edges of the image may be converging and not plumb, due to perspective (camera tip - up or down).
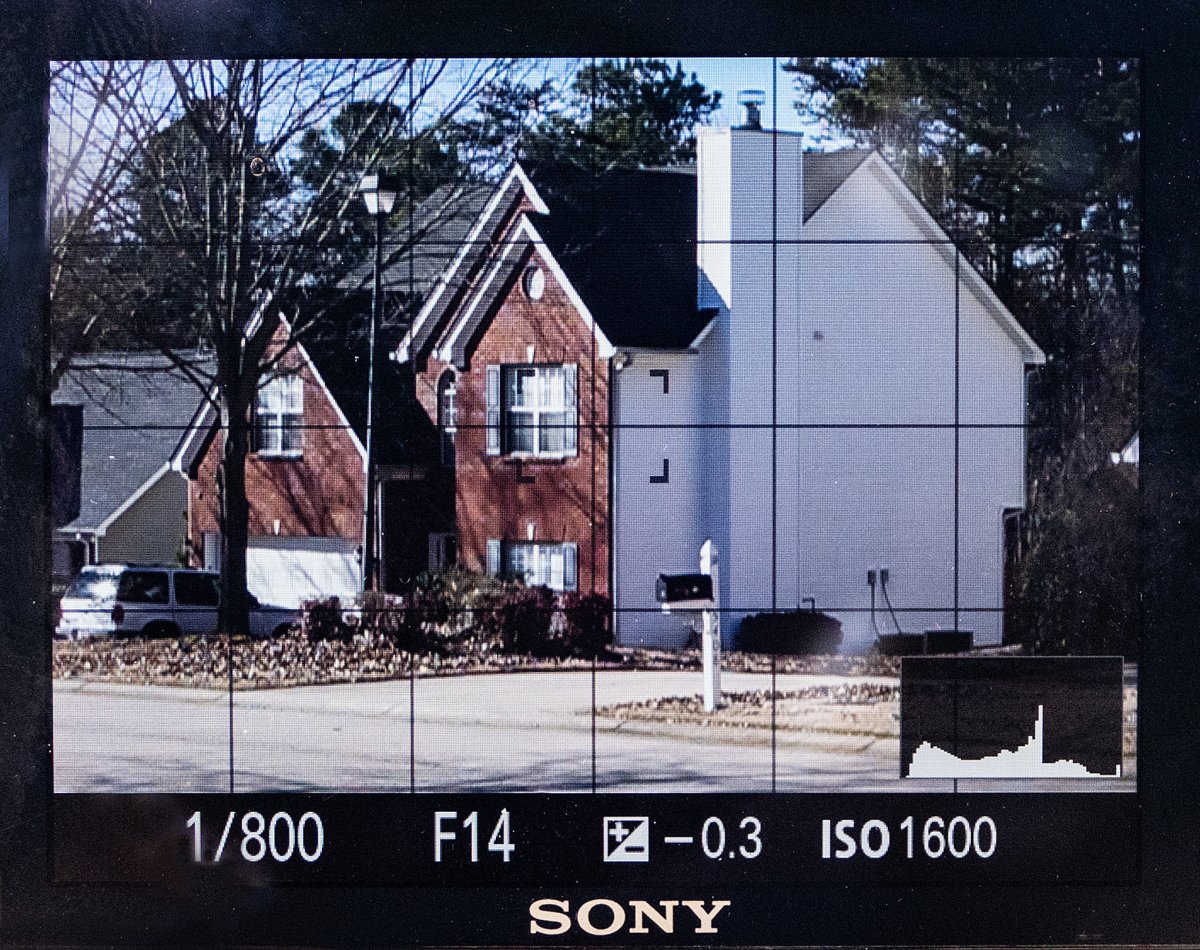
Camera grid display
Do you find tilt-indicators or grids distracting? Fine, just click them off with the camera’s display button and they’ll go away. Go ahead and shoot. Maybe you’ll get lucky.
Foreshortening
Early on, I said near things look large and far things look smaller. Well, DUH! That is the very basis of visual perception and perspective. A related phenomenon is called foreshortening. Foreshortening is the distortion of size and depth relationships in our subjects due to distance. Up close, the relative size of similar objects, and the apparent distance (depth) between them is obvious, maybe even exaggerated. In a telephoto view, all seem to be about the same size and too closely stacked together in depth, i.e., “flat.” So, subject to one’s aesthetic taste, some foreshortening may be good and some may be bad.
One of my favorite Ansel Adams photographs, which I don’t have permission to reproduce here, is “Mount Williamson, Sierra Nevada from Manzanar,” where he used foreshortening to great effect, making the rocks in the foreground look like huge boulders as large as the mountain in the background, and with full depth of field. I’m not sure if they were in fact massive boulders, but maybe just close-up average rocks. Google the image. Great impact! I could explain how he achieved this effect on film with his 8x10 inch view camera, but that’s beyond the scope of this article. Duplicating the effect with a digital camera would require using a wide-angle lens and multiple exposures with focus-stacking technique.
Perspective in portraiture
Let’s close with perspective in portraiture. Perspective and foreshortening apply to all subjects, not just scenery or rectilinear surfaces of buildings. Have you ever seen the famous WWII recruiting poster “Uncle Sam Wants You!” where he was pointing a huge finger right at you? That’s emotional and effective use of foreshortening in commercial portrait painting.
Another example from years ago was a very humorous TV ad for a room deodorant spray, “In-laws dropping by for a visit?” where a large-nosed, middle aged couple, with their noses further greatly exaggerated by optical foreshortening, were shown close-up and grinning as they entered the front door. It played on the housewife’s insecurity about guests smelling the onions she just cooked, or other household odors. Another effective, intentional use of foreshortening. So, you can use it or not. It can add impact, emotion, humor, etc. to certain pictures.
In sculpture, the science of foreshortening has been used to create human, mythical or divine statues that need to be-seen-as normally proportioned when the sculpted figures are to be mounted high on the cornice of a tall structure but will be viewed from below at pedestrian level. So, the figures were carved too tall. Without this artifice, the statues would look unnaturally short.
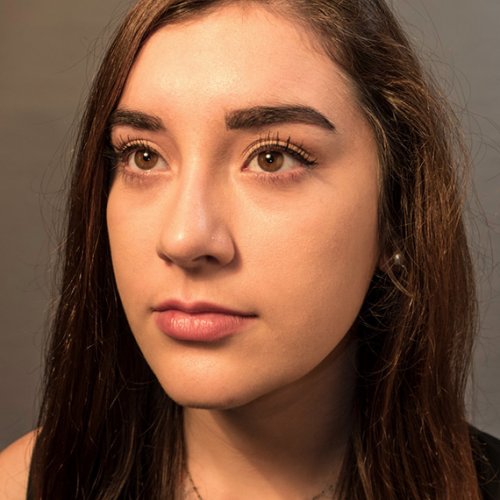
Back to portraiture. Foreshortening can be terribly unflattering to the subject. It can make the head look asymmetrical, and depict the nearside eye, cheek and brow as too large for the rest of the face. It is most often due to being too close. Think of arms-length “selfies.” Uniformly awful due to foreshortening! Using a “selfie-stick” to increase the distance helps, but not much. Or, a portrait from too far away will look like a paper-doll.
Seven Foot “Rule” for Portraits
From an extremely experienced professional photographer I admire, Chuck Rogers, I take as gospel that the ideal camera-to-subject distance for portraits is seven feet.
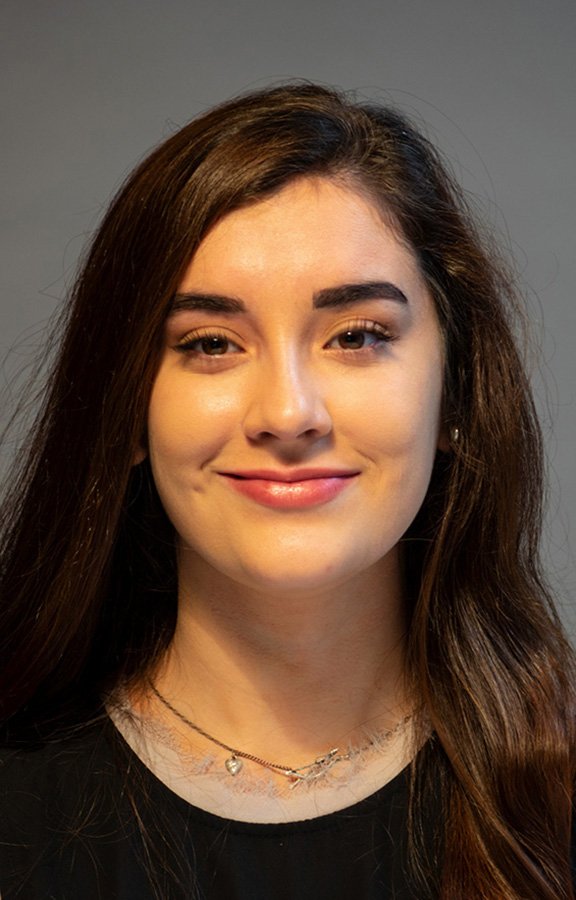
Normal Portrait
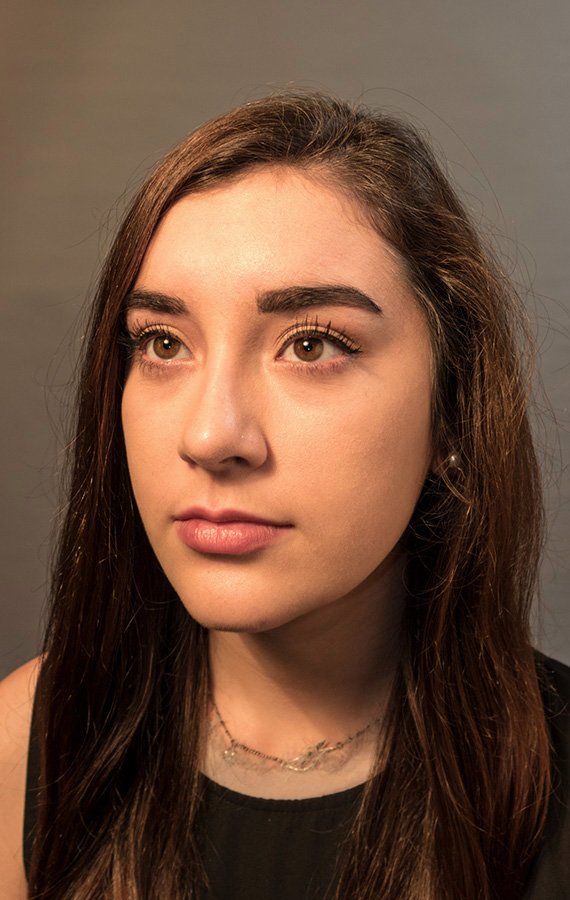
Foreshortened Portrait
Seven feet gives a pleasant perspective to the head and face, no matter what pose or lighting scheme is used, and avoids violating the sitter’s personal space or “social distance.” Except for loving situations, like amorous couples snuggling, or people holding babies and pets, we don’t like being too close to others. Babies seem to enjoy it, though. Perhaps their immature vision can only truly recognize the parent’s or sibling’s adoring face up close. But I digress.
For portraits, being too close makes the poser uncomfortable and results in less than optimal facial expressions. For other poses, like three-quarters or full-length views, a bit more distance is needed, again to avoid foreshortening. In-camera cropping for portraiture is optimized by choosing a longer focal length lens, perhaps twice the normal focal length, or by using a zoom lens. BTW, the one-way stretching trick using Image Size, previously shown here with a building, is often used vertically with fashion or glamour full-lengths to make the model look a bit taller and slimmer.
Being too far away shows up as the head and face looking flat. Or, from a distance, if an arm or leg is extending toward the camera, foreshortening will make that appendage look unnaturally short. Basically, my only suggestions for better portrait perspective all have to do with your shooting set-up and distance. Except for a little vertical image stretching, to make the model appear slimmer, I know of no fixes in the computer.
Summary
Visual perspective in photographs, paintings and drawings may improve the sense of realism and impart added information versus a straight-on “zero perspective” view. Alternatively, differing perspective may make things look unusual, perhaps intentionally, for added impact or other goals. Non-Photographer artists must solve or use perspective to make good images. The knowledge and techniques for how to do this date back to the renaissance, approximately to the fifteen-hundreds.
In photography, your camera and lens solve perspective for you automatically, but not necessarily giving satisfying results. As photographers, we need to be aware of and exercise mastery over perspective just as we do with f-stops, shutter speeds, ISO numbers and other controls. Ideally, most of this occurs before pressing the shutter button. A lot of it we need to do with our feet: picking the best vantage point and moving the camera there!
The theme repeated throughout this article is that being too close to your subject usually results in an objectionable, exaggerated, too strong perspective. So, back off! Conversely, being too far from your subject will yield a flattened, foreshortened view. Switching lenses or zooming will give a larger or smaller image but won’t change the perspective. Zoom with your feet to get the right perspective for your image.
Remember, for appropriate perspective, DISTANCE RULES!

