Part Two: Creative Exposure
Additional concepts you need to understand to take creative control of your camera include depth of field and its counterpart, selective focus. Both are controlled by f-stop, but are also affected by camera to subject distance and focal length.
Depth of Field
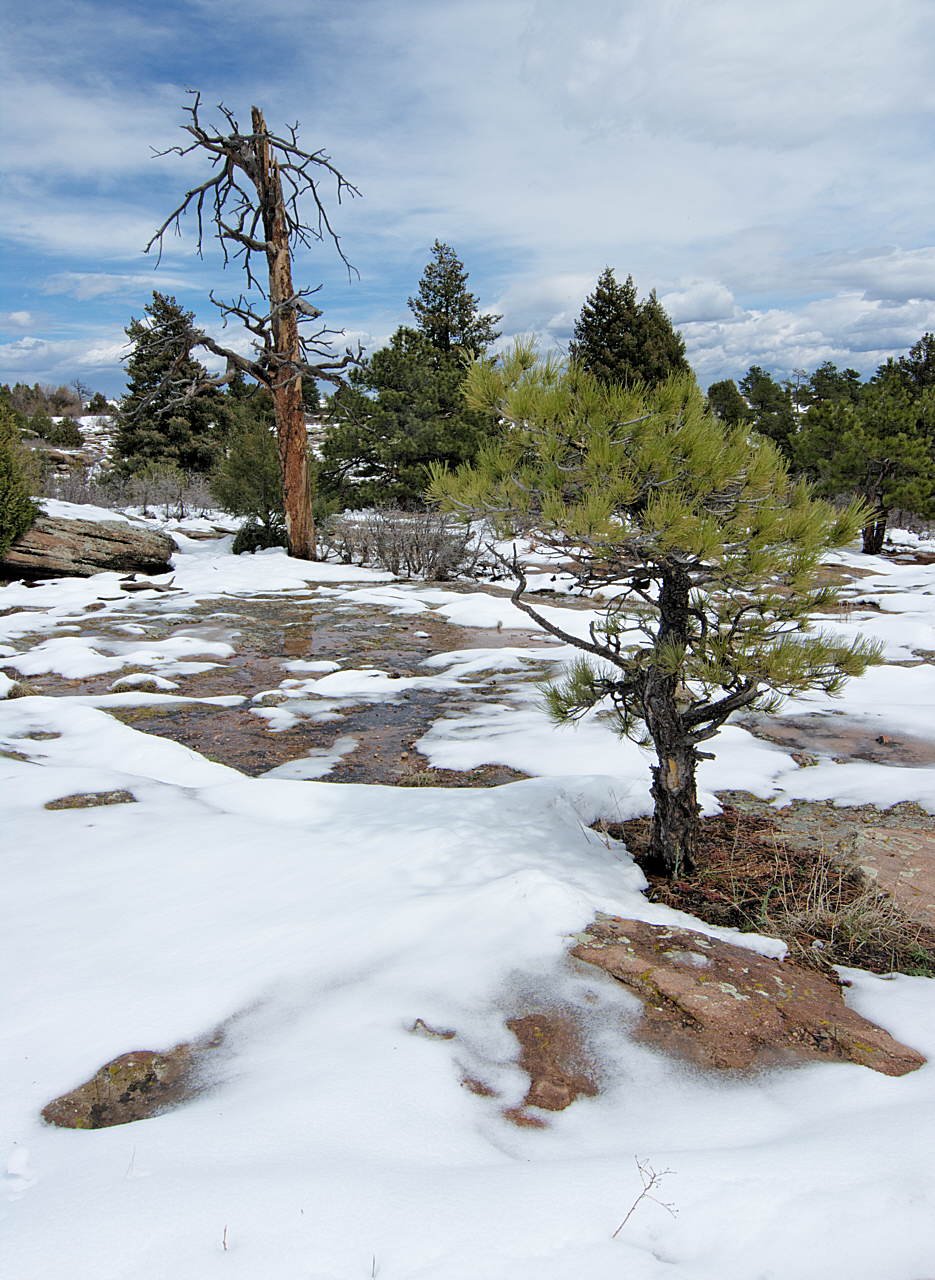
Depth of field (DoF) is the distance of apparent sharp focus, from near to far; that is, in front of and beyond the point of actual sharp focus. So, depth of field is fakery! It is the ability to fool the viewer’s eyes into thinking there is a zone of sharp focus. Sharp focus exists only on the plane of focus which is perpendicular to the direction the camera is pointing. Great (extended) depth of field is most often advantageous to scenic views where you may wish it to seem that everything is sharp. Depth of field is greatest when using smaller apertures, e.g., f.11, f.16, or f.22. DoF is also greatest when the principal subject is a considerable distance out from the camera, e.g., 50-100 feet or more; and when using a wide-angle lens (a shorter than normal focal length lens).
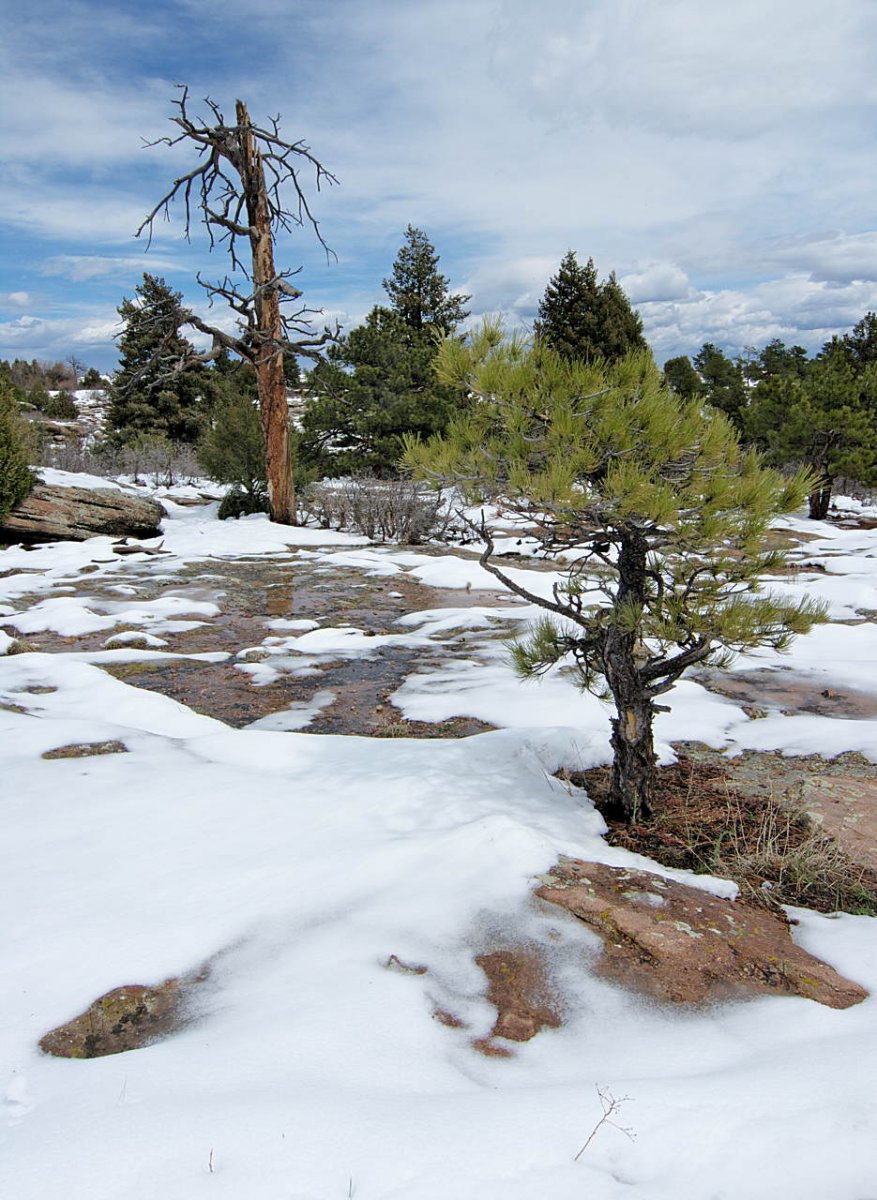
Large Depth of Field: Snow - Castlewood Canyon Rim by Jim Harrison
Conversely, DoF is least when using a wide aperture (e.g. f.1.4, f.2, f.2.8), when the subject is relatively close to the camera, say 3-6 feet or less; and when using a longer than normal focal length lens or zoom setting. In this regard, a “normal” focal length is one that renders the subject in a perspective close to what your eyes would.
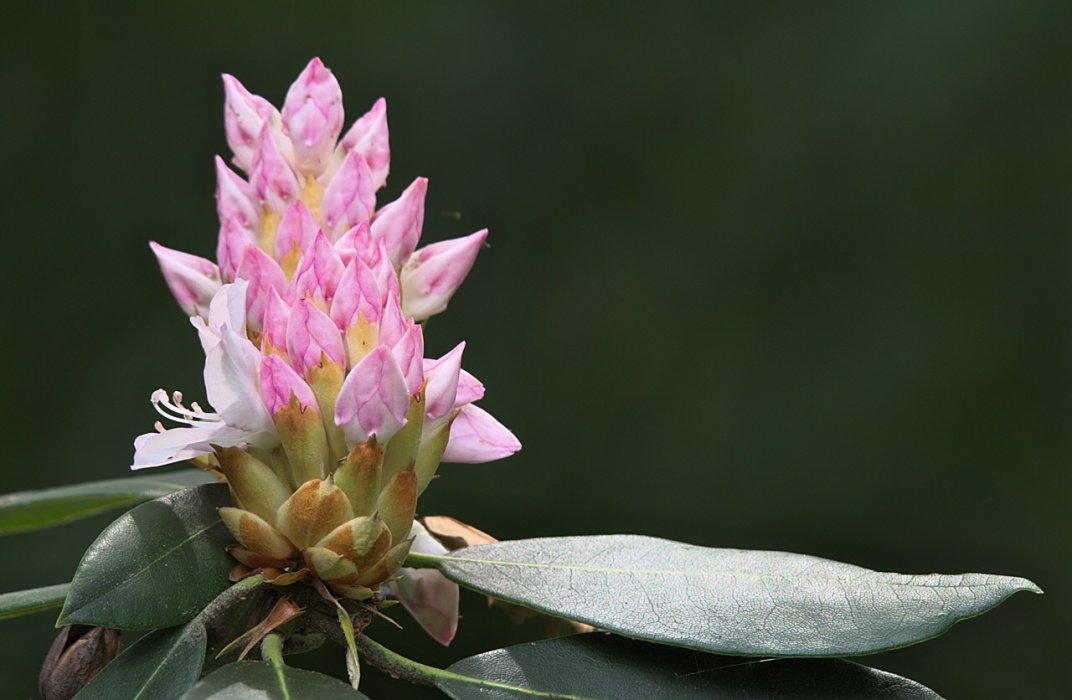
Small Depth of Field: One Bloom Before Many by Jim Harrison
Selective Focus
Selective focus is the intentional rendering of areas nearer and farther than the actual plane of sharp focus (usually set on the center of interest) as less than totally sharp. This will often help to minimize distraction from the photo’s center of interest. Your eye always goes to the sharpest areas of the image (also to the brightest, so be aware of that, too). Selective focus is most effective when a wide aperture is selected, when using a longer than normal focal length, when the subject is relatively close to the camera, and when the background is of a different color or brightness - usually darker, than the subject. Selective focus is very useful for portraits and when photographing small objects. It may not even be possible for some large, distant subjects like landscape scenes.

Selective Focus: Waiting for Her by Marc McElhaney
Exposure Modes of Modern Digital Cameras
On modern digital cameras, several exposure control methods, called exposure modes, are possible.
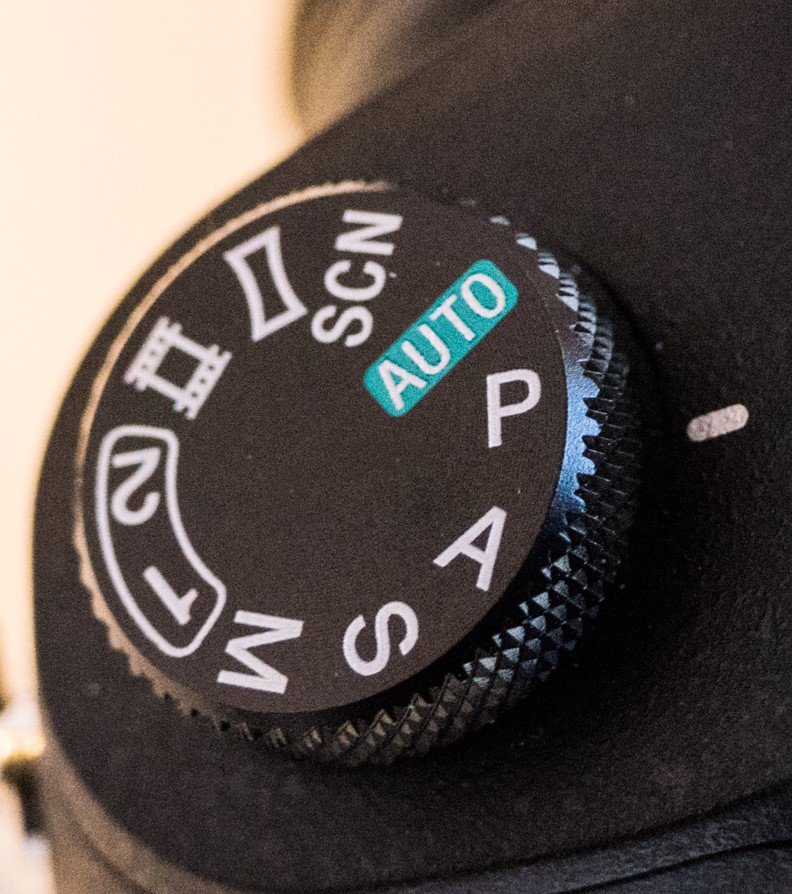
Exposure Mode Dial - Set to Program Mode by Don Stephens
Programmed Auto Exposure Mode (P) means the camera/meter automatically sets both aperture and shutter speed according to meter information and a pre-planned program. You may or may not be able to adjust or control the program. Some cameras also feature a fully Automatic option (Auto), which is for beginners and probably doesn’t allow further exposure control by the photographer.
Manual Exposure Mode (M), means just what it says. The photographer manually sets both the f-stop and shutter speed (probably using the built-in exposure meter, or a separate hand-held meter, for guidance) before making the exposure. Manual exposures (M) may result in large exposure errors if you ignore the meter’s guidance.
Aperture Priority Mode (A) means you set the aperture and the camera/built-in meter automatically sets the corresponding correct shutter speed at the instant you press the shutter. Aperture preferred mode is used when depth of field or selective focus is very important. Be aware that an unsatisfactory (too slow) shutter speed may be set by the camera/meter, thus causing blur from camera jiggle or movement during exposure. Watch for this when shooting Aperture Priority Mode, and be prepared to brace yourself and the camera (against a tree, building, etc.) or use a tripod
Shutter Priority Mode (S) means you set the shutter speed and the camera/meter automatically sets the corresponding correct f-stop. S mode is often used to force a fast (brief) shutter speed to freeze moving subjects or prevent camera shake that can blur images. Using the S mode can also force long exposures for an intentional blurry effect to soften moving water or clouds. Note that it may be necessary to increase the ISO setting in either A or S modes to get a correct exposure, or decrease ISO for long exposures.
Rules of Thumb for Exposure Modes
To freeze moving subjects, especially if they are close to the camera, use 1/1,000th of a second or faster. You may have to increase ISO for these higher shutter speeds or in reduced light. To minimize blurriness due to camera shake, always be sure to set a shutter speed of at least 1/30 second for wide angle work, and a shutter speed at least equal to the reciprocal of the focal length of longer lens work. For example, when shooting with 100mm focal length, use 1/125th second or faster; for 400mm focal length, use a shutter speed of at least 1/500th second, etc. Again, changing to a higher ISO may be necessary. When in doubt: use stability aides like a tripod or monopod! For nice soft, blurry rendering of waterfalls and riffles (or any moving subject), force a slow shutter speed, perhaps one second or longer. You’ll probably also need to set ISO as low as it will go and perhaps add a neutral density or polarizing filter to correctly expose with such a slow shutter speed. Experiment! And, of course, use a tripod.
Metering Modes: Full Frame, Center Weighted and Spot
Most digital cameras also have a choice of metering modes – which areas of the image frame to meter. Typical options include: full frame – an “average” of exposure across the entire image; center weighted – an area including and around the image center, somewhat smaller than the whole frame, and often indicated by markings (reticle lines) within the image frame; and spot – a small area in the center of the frame, again often shown by a small circle or other reticle lines in the viewfinder. All these metering modes can be very helpful to insure a proper exposure for your image. One useful example is spot metering of a human subject’s face for a portrait.
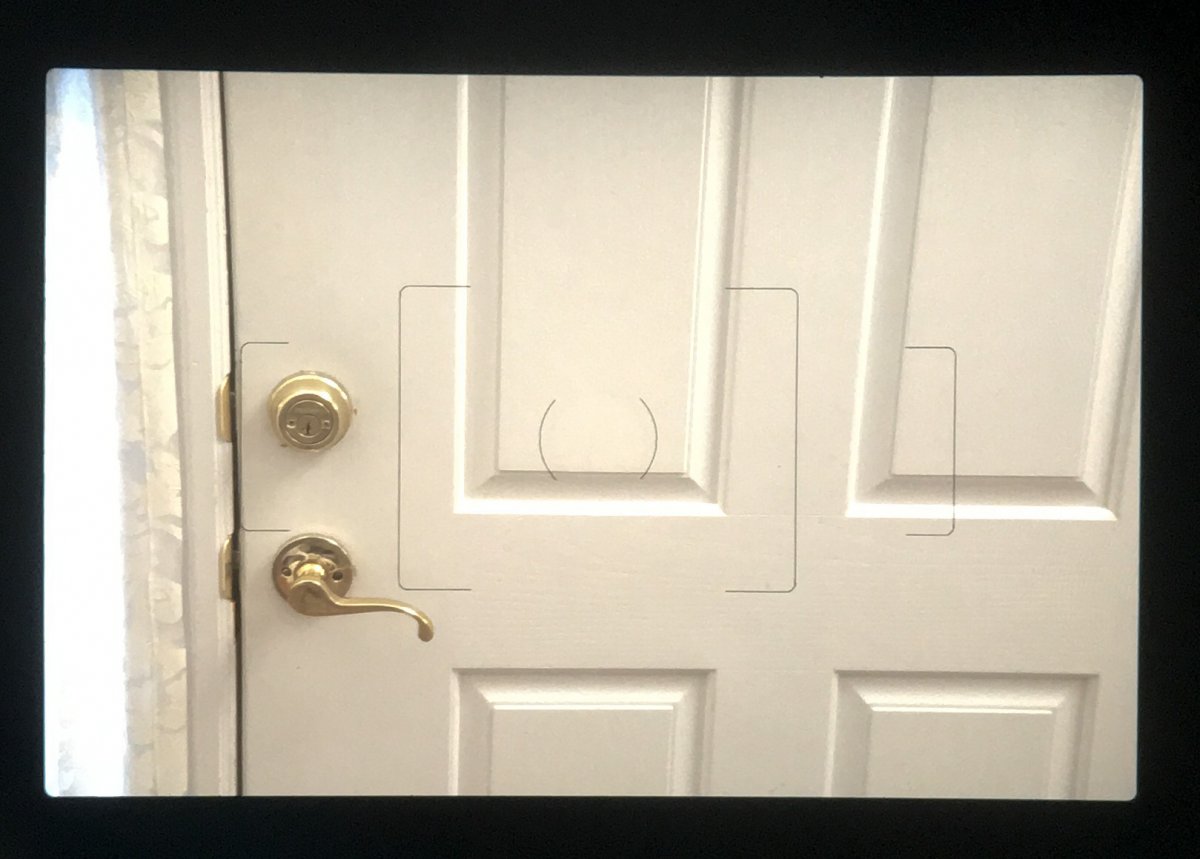
Metering areas: Spot, Center-Weighted and Full-Frame by Jim Harrison
Exposure Compensation
Another control on most digital cameras is exposure compensation, which allows you to adjust automatic exposure settings (plus or minus) by fractions of an f-stop. Exposure compensation can be left “on” or can be reset for each exposure. Some camera settings reset exposure compensation to zero whenever the camera is turned off. If left on by accident, it can make you wonder why your automatic exposures don’t look quite right!
Exposure compensation is a very handy way of forcing exposure away from the normal exposure called for by the built-in exposure meter. I recommend always using an exposure compensation of minus 2/3 of an f-stop when shooting in bright sunlight. This helps minimize chances of blown-out highlights. That’s usually enough. Note that exposure compensation will not work in M or Auto modes, but only in A, S or P. As stated earlier, minor under-exposures are probably OK because that can be easily corrected in the computer (post production).
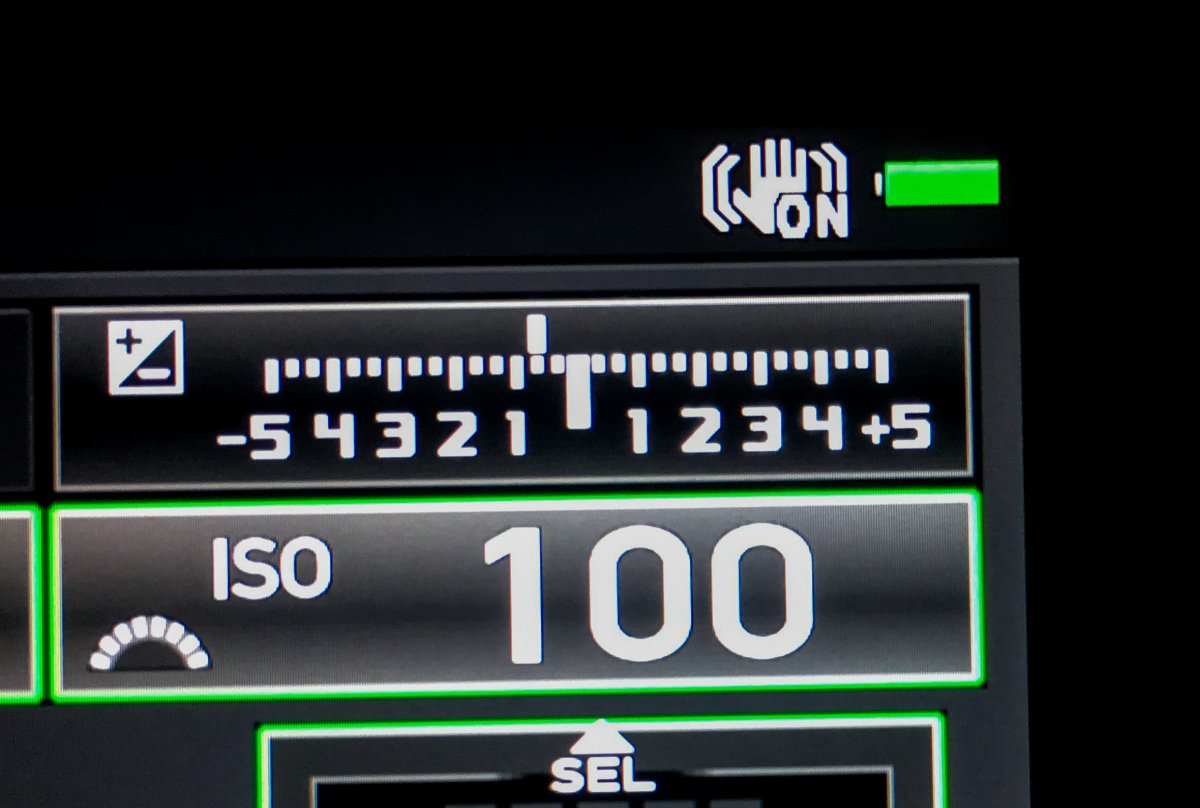
Exposure Compensation Display: -2/3 Stops by Jim Harrison
Next installment: Part 3 - Additional Exposure Techniques.