Exposure with LED Lights
In the digital world, with usable sensitivity set on the camera (ISOs of 800, 1,600 and higher available), we no longer need all that power of the old-style lights. In addition, for video we must have flicker-free continuous light. Photographic LED lights today are not nearly as powerful as the former flash units. At modest ISOs, even with LED lights rather close to the subject, we often get exposures of f.1.4 to f.5.6 or maybe f.8 if we’re lucky, with corresponding shutter speeds (or video equivalents) that might be 1/30th to 1/60th of a second or so. That is weak light and forces an entirely different mindset on an old-school photographer. Want to freeze action like we could do with electronic flash? Fuhgeddaboudit! Are more powerful photographic LED lights on the horizon? They must be. The brightest automobile headlights today are LEDs, therefore limited brightness must be solvable (at some price!).

ISO Settings
Since I did not own any LED lights, and wanted to try to test some before writing this blog (and do so without spending a bunch of money!), I set out to borrow a few from friends. I am a senior citizen and retired from the studio business. So, too, are many of my photography buds. In seeking LED lights to borrow, guess what I found? Most of them do not own any LEDs either! Despite LED’s broad capabilities for both still photography and video, I found that most still photographers think “those are only for video, and I don’t do that.” Bad attitude! Or, “I only shoot outdoors these days so I don’t think about that lighting stuff.” Well, if you want to create great photographs, maybe you should think about that stuff. Even in strong, direct sunlight, lighting equipment can enhance and improve many outdoor shots. That includes using something as simple and inexpensive as a scrim or reflector.
Back to the power of lights for a moment - many still photographers’ attitudes (especially among the older ones) are based on the fact that LED lights don’t come close to the power output that we became accustomed to from electronic flash - from either the portable ones with separate shoulder-strap battery packs or the wall-powered (studio type) flash units.
Sensitivity in the Camera
Back in film days, when color transparency films had very limited sensitivity ratings (ISO 50 to 80 was common and basic Kodachrome had an ISO rating of only 25!), my studio flash units could achieve good exposures at 10 feet or more at f.11 to f.22 with an actual flash duration of maybe 1/400th of a second. Now, that was power! The lights even made a loud “Pop!” when fired.
Could you do anything to increase the sensitivity (ISO ratings) of films? Not much. “Push processing” (giving extra time in the developing solutions) was a widely popular idea, but seldom totally successful. Ansel Adams stressed in his books that push processing mostly bumped contrast which you did not need and gave little boost in shadow detail where you did need help. Many old-time photographers will disagree with me on this point! For various reasons, push processing was often more successful with color transparency films than with B&W negative films (color negative films could not be pushed at all). However, unwanted increase in contrast was always a factor in both. I did a lot of “multiple pops” work where I reduced modeling and room lights, then flashed several times to build up exposure on the film. The goal of all this was to allow smaller lens aperture for desperately needed increased depth-of-field, not to “push” ISO just for the heck of it. With continuous light, you could just keep increasing exposure time as you set smaller lens apertures, though reciprocity departure and color shifts happened. These film techniques do not really apply in digital because only a few latest, highest-end camera models allow multiple flashes on a single image frame, and that is provided for special effects uses and not to boost ISO. Also, extended exposure time builds up noise in the capture. Digital noise looks like coarse grain in film photography. Both cameras and imaging software have “noise reduction” tools, but their effectiveness is limited.
Allow me to insert an old joke here. Fuji Film was announcing a new film with an ISO of 1,000,000 at a press conference, when a question came from the back of the room, “Yea, but can you push it?”
A footnote: “ISO”, an indication of film or camera sensitivity to light, stands for International Standards Organization, which replaced the older “ASA,” or American Standards Association numbers, and the German “DIN” logarithmic scale. IMHO, for those meaningless abbreviations to have lasted for 100 years, as they have, is the stupidest thing in photographic history. Why not just call it what it is? “Sensitivity.” ISO is even dumber terminology than “f-stops.” But, I digress, again.
Technical Strengths of LED Lights
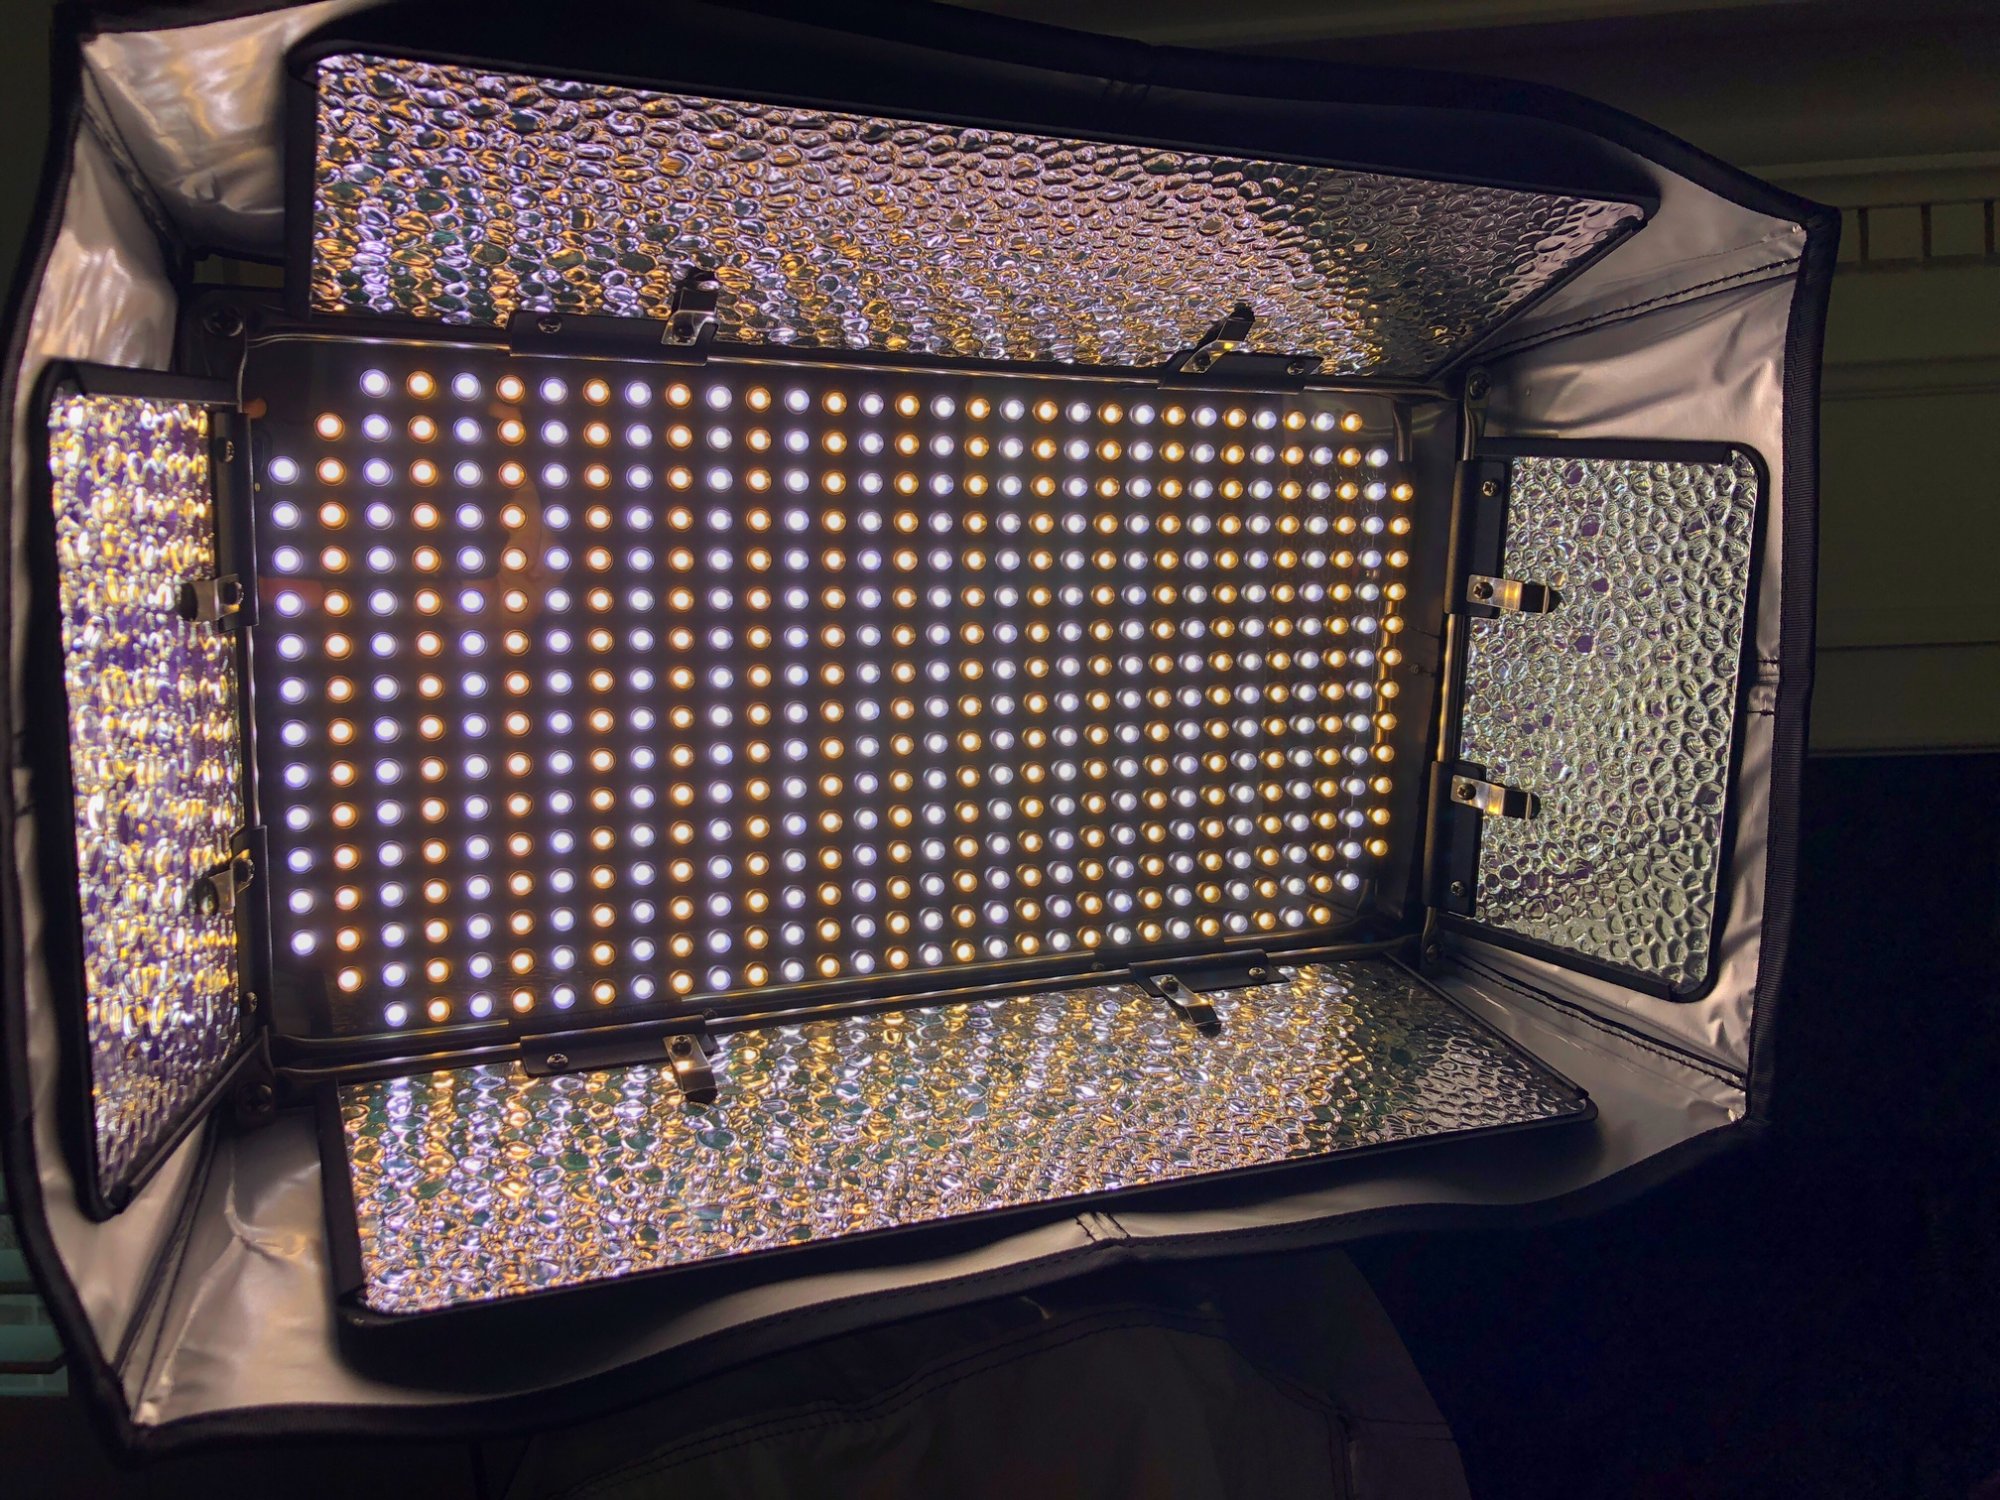
So, this gets us to the capabilities of LED lights: why they are superior to most other types of photo lights for certain purposes. Let us put “dimming” - matching or complementing existing light’s brightness - as the first thing we want. In prior years, anytime we used a rheostat to dim our continuous “hot” lights, they changed color, became more yellow and red. That did not matter much for B&W work but was terrible for color photography. Any LED light you purchase today can be dimmed without changing color. Terrific! Much of that is attributable to built-in variable pulse-width electronic dimmers.
Next, most of these lights can be adjusted (tuned) to emit light of a certain color (though a few are daylight balance only). It is important to be able to MATCH the color of ambient or other lights if using the LED as a fill light. The LED might serve as a key light for a face or small object within a scene that is mainly illuminated by ambient or other lights, so you still need a match. Before these LED lights, we could do “flash fill” with our portable flash guns, though brightness issues, color mismatch and hard shadows were problematic and results were seldom beautiful or realistic looking.
Some Home Work
Your home-work assignment: get into a critical frame of mind and watch some TV news. Compare different networks. The network anchor is beautifully lit (and professionally made-up) and matches the color and brightness of the set or background lighting. When the TV switches to a person being interviewed from some remote location, the interviewee (not a full-time TV personality) usually has no make-up, may be poorly lit and shot, perhaps using a phone camera with no added lighting. Ug-ly! Light on the face may truly be awful, and the surroundings (maybe even the face) may be green from the room’s fluorescent lights. Watch a few of these remote TV interviews and you will totally understand where I’m coming from about the potential value of LED lights, together with camera WB settings. They enable you to match your key or fill light and your camera to the ambient light. Limited time, manpower or budget (and knowledge?) often force local TV news, or even network news, to settle for poor quality.
One Light
Of course, the simplest and probably most common indoor lighting situations would be head shots, children, pets, and small objects. Do not forget that you and your audience may not be very critical when viewing these simple photos. For simple, small set photography and portraits we can probably ignore ambient light and simply match the camera white balance to whatever our LED light is set or use auto-WB. Most of us do a lot of ambient light work these days, so we may have to set everything to match that. One light, perhaps augmented with a reflector, is probably the most natural looking and beautiful lighting you can do. After all, we only have one sun in nature photography. Achieving a “one-light” look is the desiderata, even if we must use multiple lights to fill shadows. Using multiple lights for a simple shot adds complexity and cost to your work.
So...to re-cap: why am I so enthusiastic about dimmable and tunable LED lights? First, because I am seriously getting into video. Second, because they are very useful as “fill” lights, to augment indoor and some outdoor ambient light situations for still or video work, or as main or “key” lights for video interviews, portraits or other small subjects, even when the lighting for the background comes from other sources.
For shooting indoor environmental portraits or video interviews, LED lights really come into their own because of the tunable color temperature and dimmer control features, together with camera white balance settings. They allow you to match and correct for the existing light, and they can be powered by batteries and adjusted by remote control. They are not too big, bulky, or heavy; they can go anywhere.
Are you one of those portrait photographers who like to shoot outdoors with an extremely fast lens wide-open to get “bokeh” - those beautiful, round, out-of-focus highlights behind the model? With the lowest ISO you can set on your camera and your lens set at maybe f.1.4 for bokeh, a portable battery powered LED panel of even low power might be just the ticket to give a little fill and some catch-lights in the model’s eyes while matching overall color balance and keeping the bokeh effect.
Amazingly, this brave new world of photographic lighting gives us unheard-of creative control for both stills and video.
Neutrality vs Creativity
None of this is to say all photographers want accurate, neutral color all the time. For artistic or creative purposes they may want strong or perhaps other-worldly colors for certain projects. All artists strive to control their equipment, media, and techniques to achieve a certain style: some predetermined or pre-visualized goal. Ansel Adams preached pre-visualization: imagining the final print first, then planning backward, exposing for shadow detail and processing for contrast to achieve his goal. Basically, he only did B&W work. Color adds another dimension to the problem.
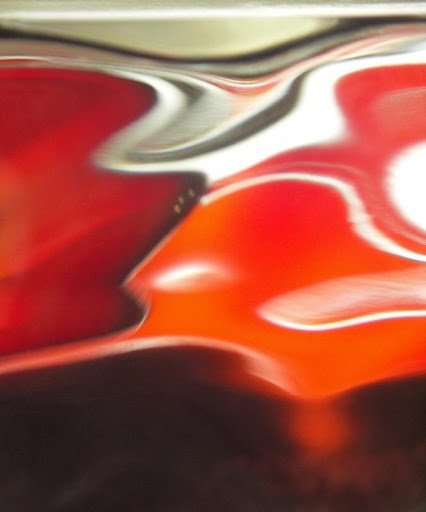
This example, “Lost Love” by Atlanta Photographic Society member, past president, and past Photographer of the Year, Ruth Gogel, is a very colorful abstract. Ironically, this may in fact be neutral, meaning accurate in color and free of polluting color tinges. Ruth’s fantastic abstracts are created using color gels with her lights and glass blocks for optical distortions.
 ''Lost Love' by Ruth Gogel
Summary
In this long blog, I have tried to accurately say what I mean and mean what I say. However, the summary can be done quickly. Color temperature is a way of describing ambient, natural, or artificial light or a mixture of these. White balance is a method of tuning your camera to optimize image color rendering under certain lighting conditions. Are they the same thing? No. Color management is controlling all the elements that go into making the image, including final output as a print or video.
In use, LED light panels are not strong enough to light a large scene (but maybe a powerful flash alone isn’t enough either). However, they are plenty strong to achieve beautiful light on the portrait subject’s face or for other small photo subjects. They are strong enough for many video projects, including interviews, and they are cool, safe, and comfortable to use. For soft light effects, use a large LED panel (a round panel would be my personal preference) or an LED light that allows use of a “beauty light” or soft box type light modifier. Set the light within a few feet of the subject. Need to photograph a large scene surrounding your portrait subject? You will probably have to use ambient light for the overall illumination and your LED for the portrait piece. First, set the camera's white balance for the environmental/available light. Don't have a color meter? Use educated guesses and test exposures. Next, tune color and dimmer controls on your LED light to be the same, or almost the same color temperature as used to set white balance. Verify color and brightness effects with test exposures.
Voila! All that is left is to tell the model to “Lick your lips and say cheese!” and press the shutter release or video start button. If the model does not give you a nice smile, “Off with her head!” will be the Red Queen’s edict.
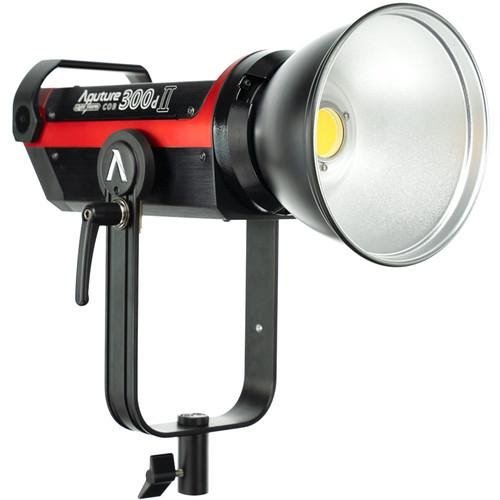
Illustration credits: Equipment illustrations come from B&H Photo, Adorama and Amazon website listings, manufacturer advertisements, and other internet sources, and are not intended as complete listings, technical reviews or endorsements, but merely fair uses to show a few of the many types of lights available. Other illustrations are by APS members Don Stephens, Jim Harrison, and Ruth Gogel.
Editor's Note: APS members Don Stephens, Jim Harrison and Darryl Neill now have (one each of) the Ikan LED light that's the background image for this article. Click on the thumbnail image above for a better view. These lights work great!