A Different Program
For our October 25, 2021 program APS Master Photographer Jim Harrison shared his experiences through all phases of his 3-axis camera slider build project. He also showed examples of time lapses and video illustrating what the 3-axis slider can do. Since his program was on-line, Jim will bring the slider to our first in-person 2022 meeting so everyone can get some hands-on experience with the equipment.
Here is a brief summary of the project's stages, a link to the program slides, plus a link to the video of his fascinating presentation.
Build on Previous Designs
Jim surveyed several dozen camera slider projects on You Tube and selected two of the best as the basis for his slider design. He combined the bottom part of Isaac 879's design with the top section of How To Mechatronics plan to envision and build his own slider, while incorporating several improvements.

Isaac 879's Slider

How to Mechatronics Slider
Learn Electronics and Programming
Over 3 months were required to learn the basics of controlling a variety of electronic components (switches, potentiometers, joy sticks, motors, displays, etc.) by using and programing the Arduino Uno (and Nano) microcontroller. Jim relied on Paul McWhorter's New Arduino Tutorials on YouTube for this training.

Arduino Uno

Some Slider Code Written in C++
Build & Test Slider Electronics and Programming
With a newfound modicum of confidence in the basic electronics and programing, Jim built the electronics for How To Mechatronics design and got that working as a prototype. But that version lacked fine control of time/duration, so Jim decided to enhance the project.

Prototype Electronics
Add Liquid Crystal Display (LCD) & Rotary Encoder for Time
The main additions were a rotary encoder to set the time/duration, and a Liquid Crystal Display (LCD) to display time and slider operations. This expanded the coding/programming from <200 lines to >450 lines.

Time/Duration With a Rotary Encoder - Display With an LCD
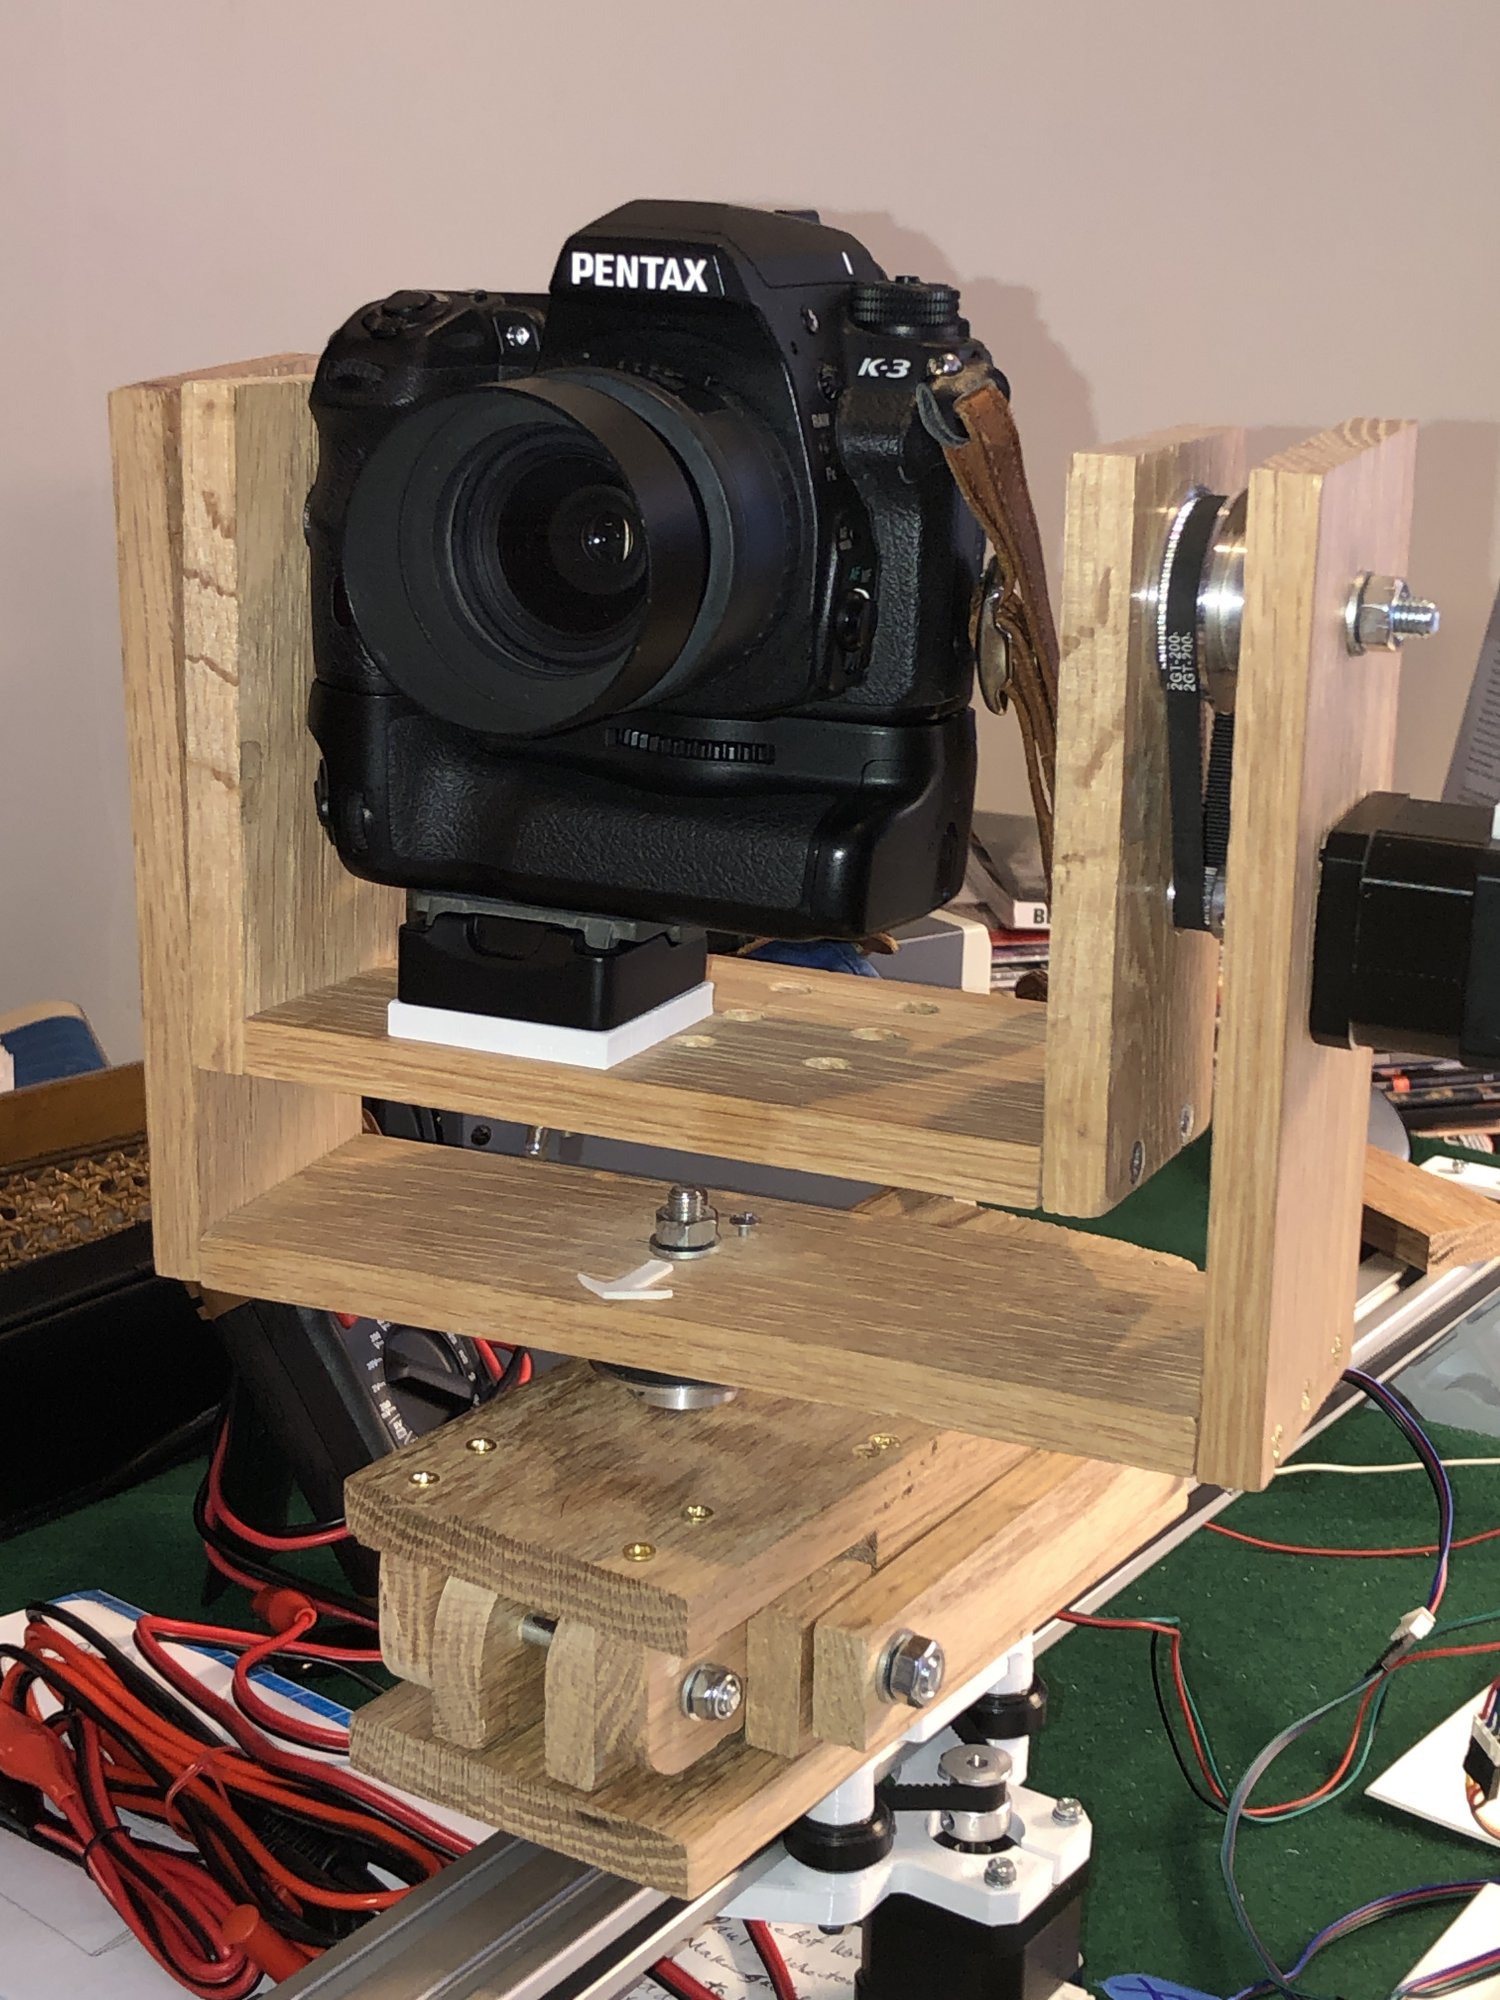
Build Physical Slider Mechanics
With the refined electronics working well, it was time to build all the physical parts of the slider. The top parts of the slider were constructed with wood, while the carriage and rail supports were 3-D printed using Isaac 879's design. Thanks to my son, Brian Harrison, for the 3-D printing assistance!

Some of the Wood Parts and Tools

3-D Printed Carriage on the Rail
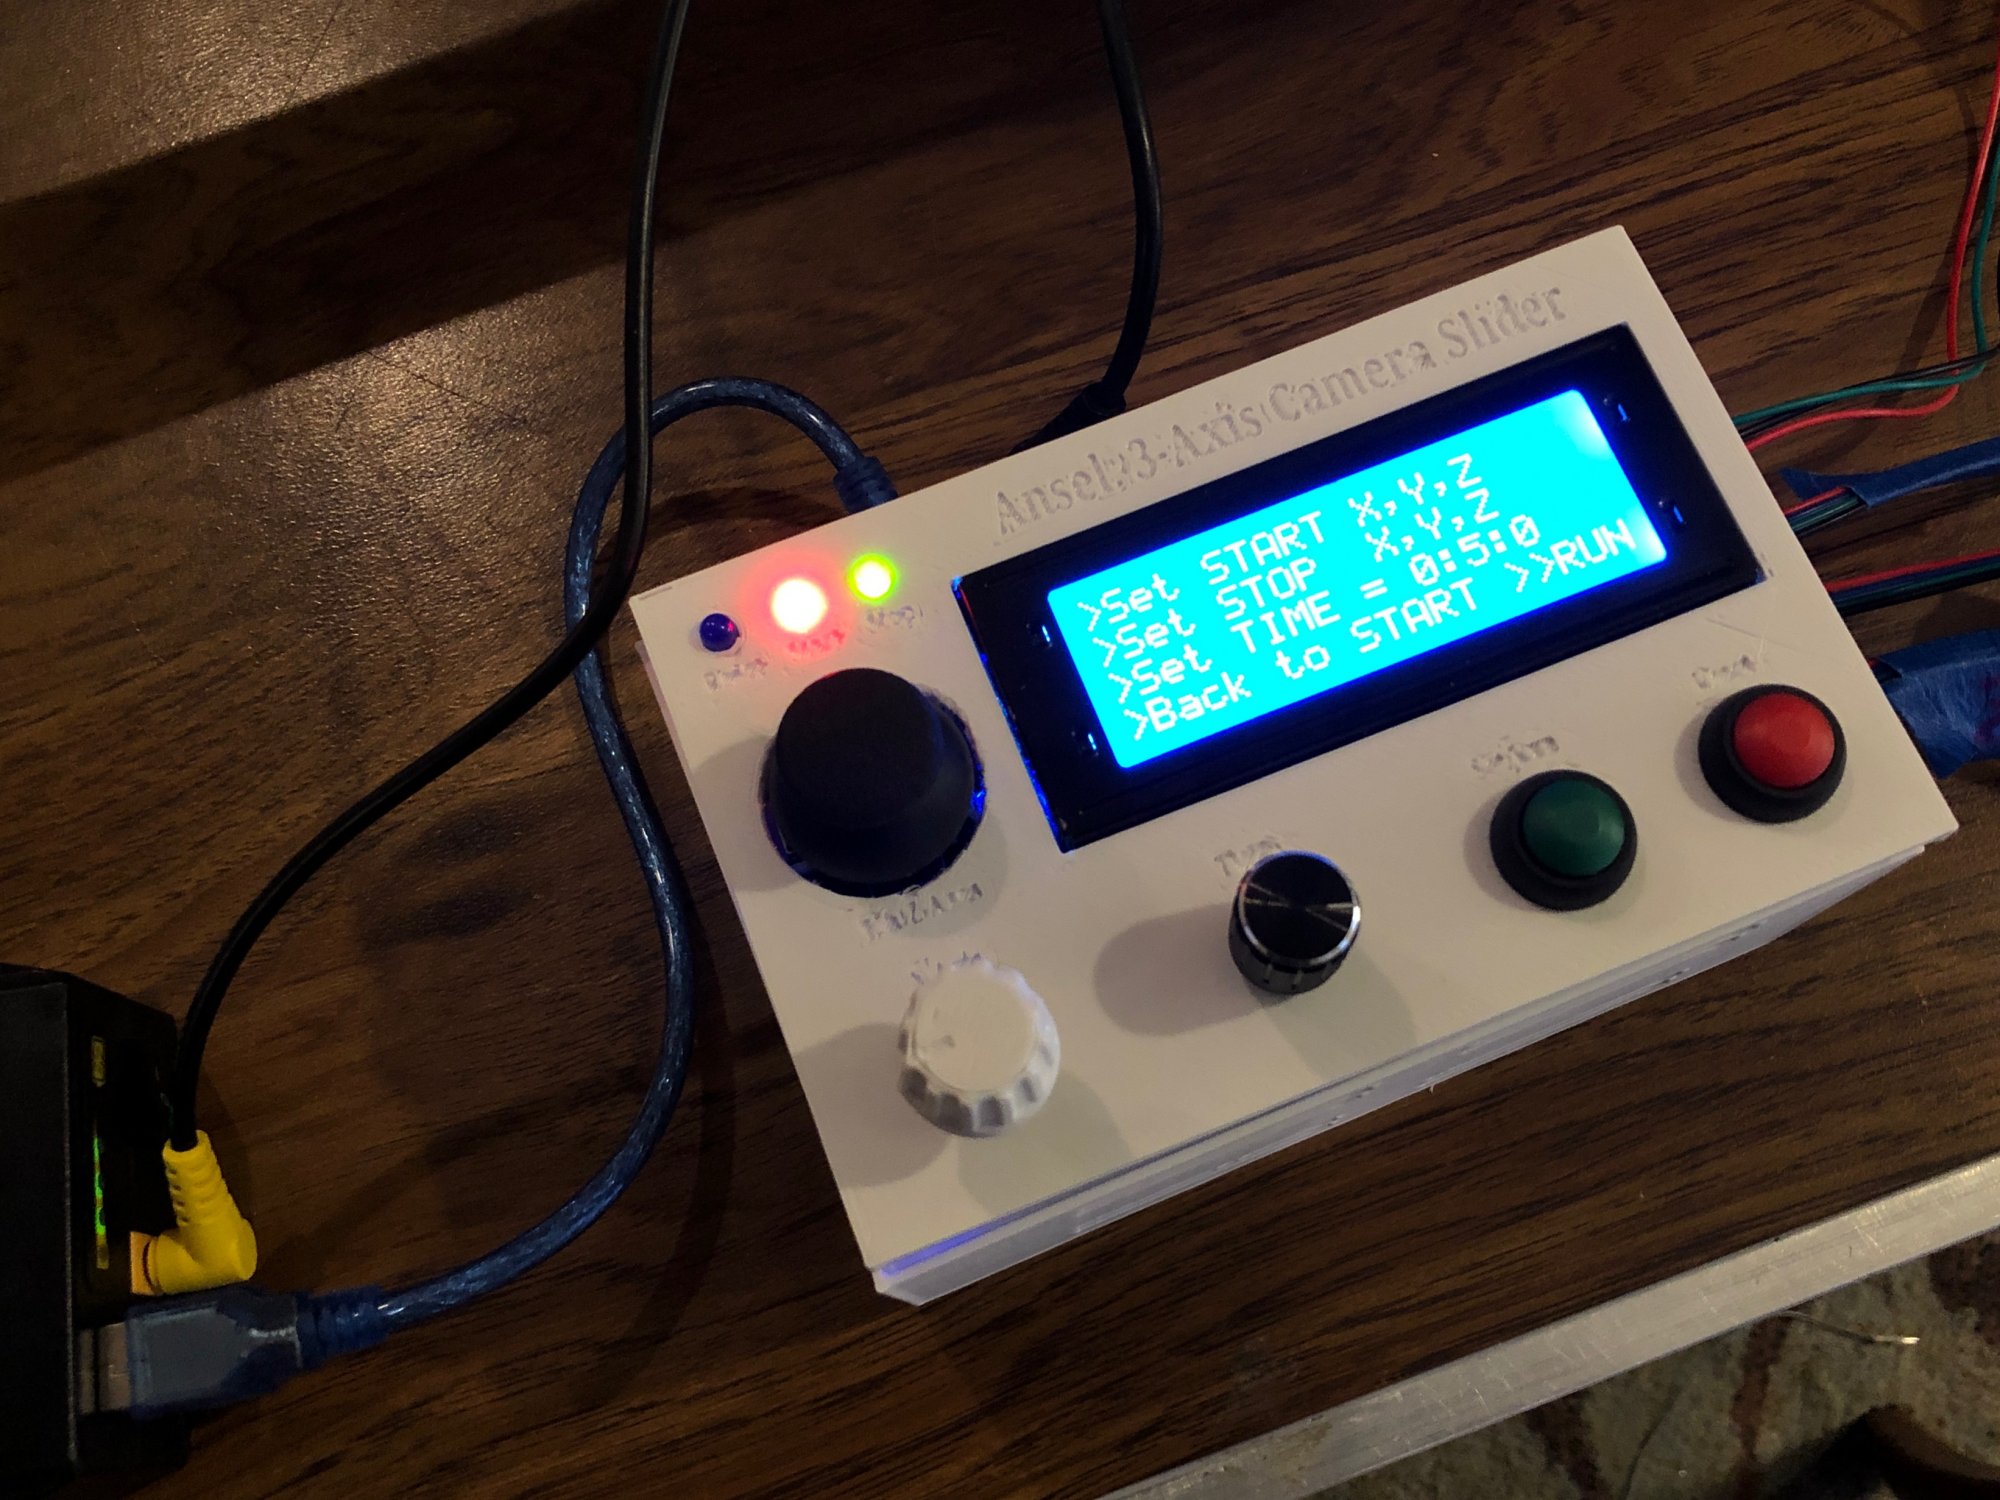
Make it Portable
After combining the breadboard electronics with the physical build It all worked (yeh!), but as you can see below, the electronics were not very portable. The two main steps for making the electronics easily movable were to design a printed circuit board to hold most of the components, and a 3-D printed box to hold those electronics.

The Final Electronics - But Not Portable Yet
Shrink the Electronics: Design Printed Circuit Board (PCB)
Jim used Easy EDA through JLCPCB to design a working schematic of the circuit, and to design a two-layer Printed Circuit Board (PCB). He used an Arduino Nano (equivalent to the Uno but much smaller) to achieve a smaller PCB footprint. A simple wiring harness board was also designed for the motor and limit switch wiring.

PCB Design in Easy EDA

Delivered PCB and Motor Wiring Harness from JLCPCB
Design Electronics Box/Enclosure
The free online CAD (Computer Aided Design) program Tinkercad (by Autodesk) was used to design the electronics box. Again Brian Harrison assisted with 3-D printing of the box.

Electronics Box Design in Tinkercad
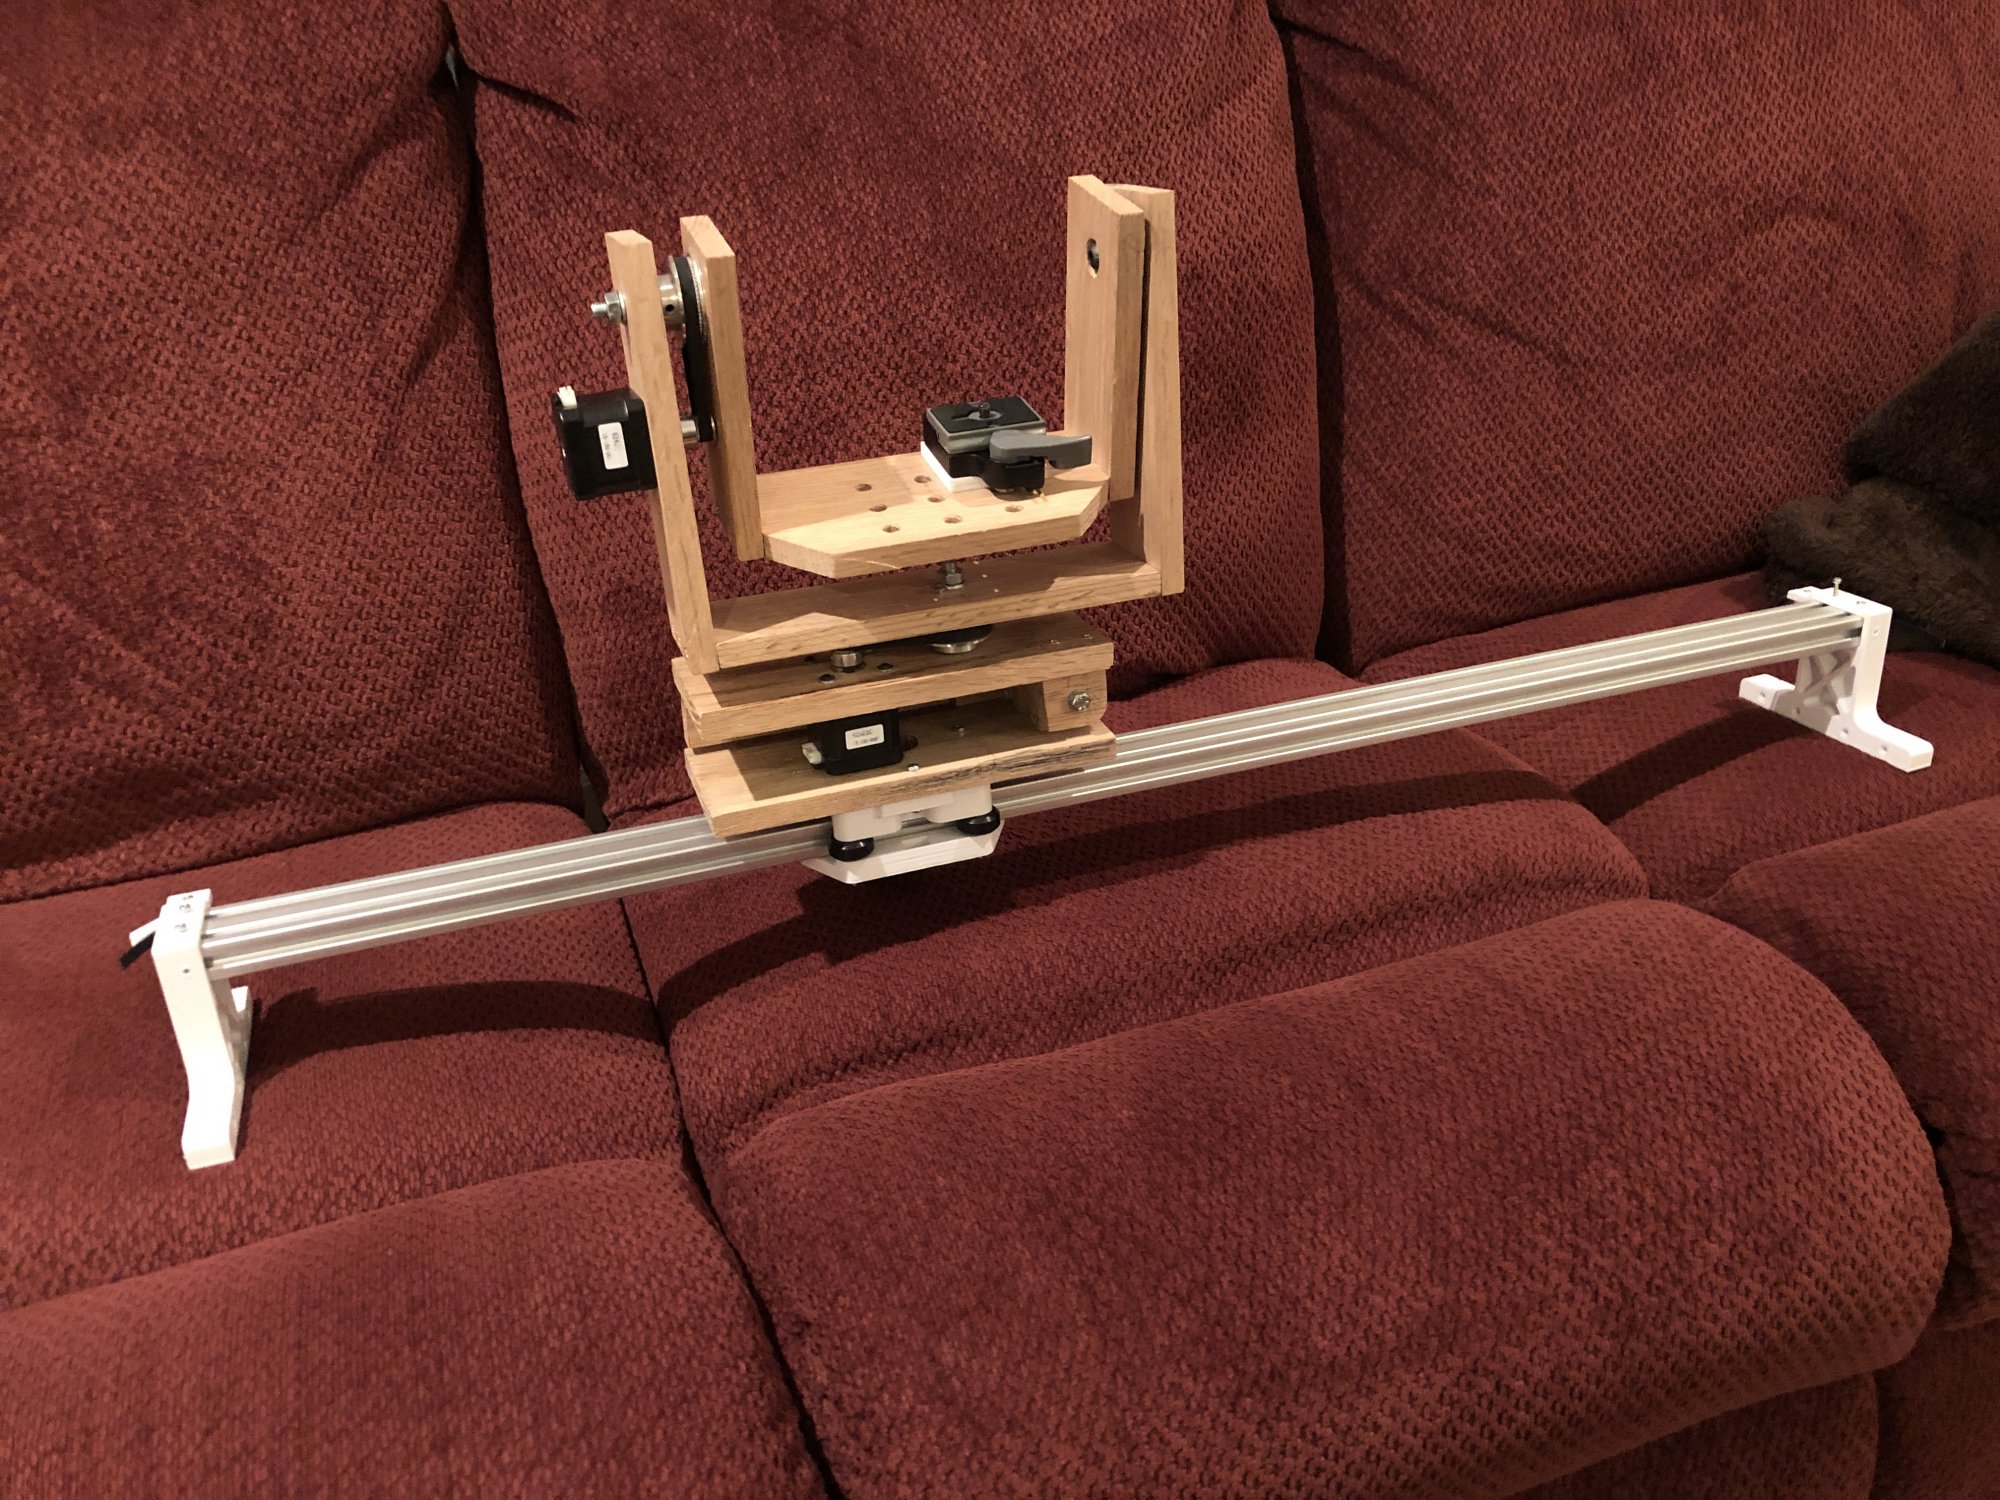
Integrate All Components – Test and Optimize
To complete the project all components were put together, with the main electronics on a PCB and enclosed in a 3-D printed box. Plus, the external wiring to the three motors and limit switch were sheathed and routed through the slider carriage.

Integration and Testing

Assembly of Electronics/Integration With the Electronics Box

Final Build with Wiring Organized
Field testing pointed out a needed physical fix for the Y-axis (pan) axel, and software improvements to speed up the X-axis when setting the Start and Stop positions, and to speed up the "return to Start position" operation.
Thanks for Your Interest!
If you're interested in more details please enjoy the Presentation Video, which includes all the video and time-lapse examples, and the Presentation Slides. The links above to several sources on You Tube will also provide a wealth of information. Plus, I'm always happy to answer any questions. (My advice is worth ~ 2 cents.) Thanks for pursuing this perfunctory prose!
(Right click to copy email)